Basic Setup
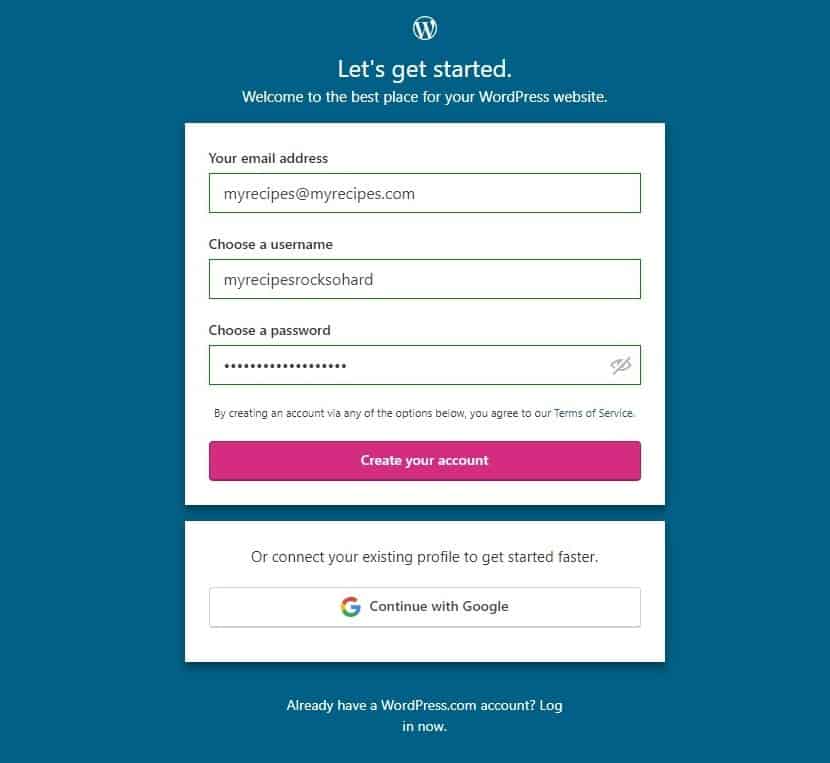
Click Get Started in the upper right-hand corner of the WordPress.com homepage.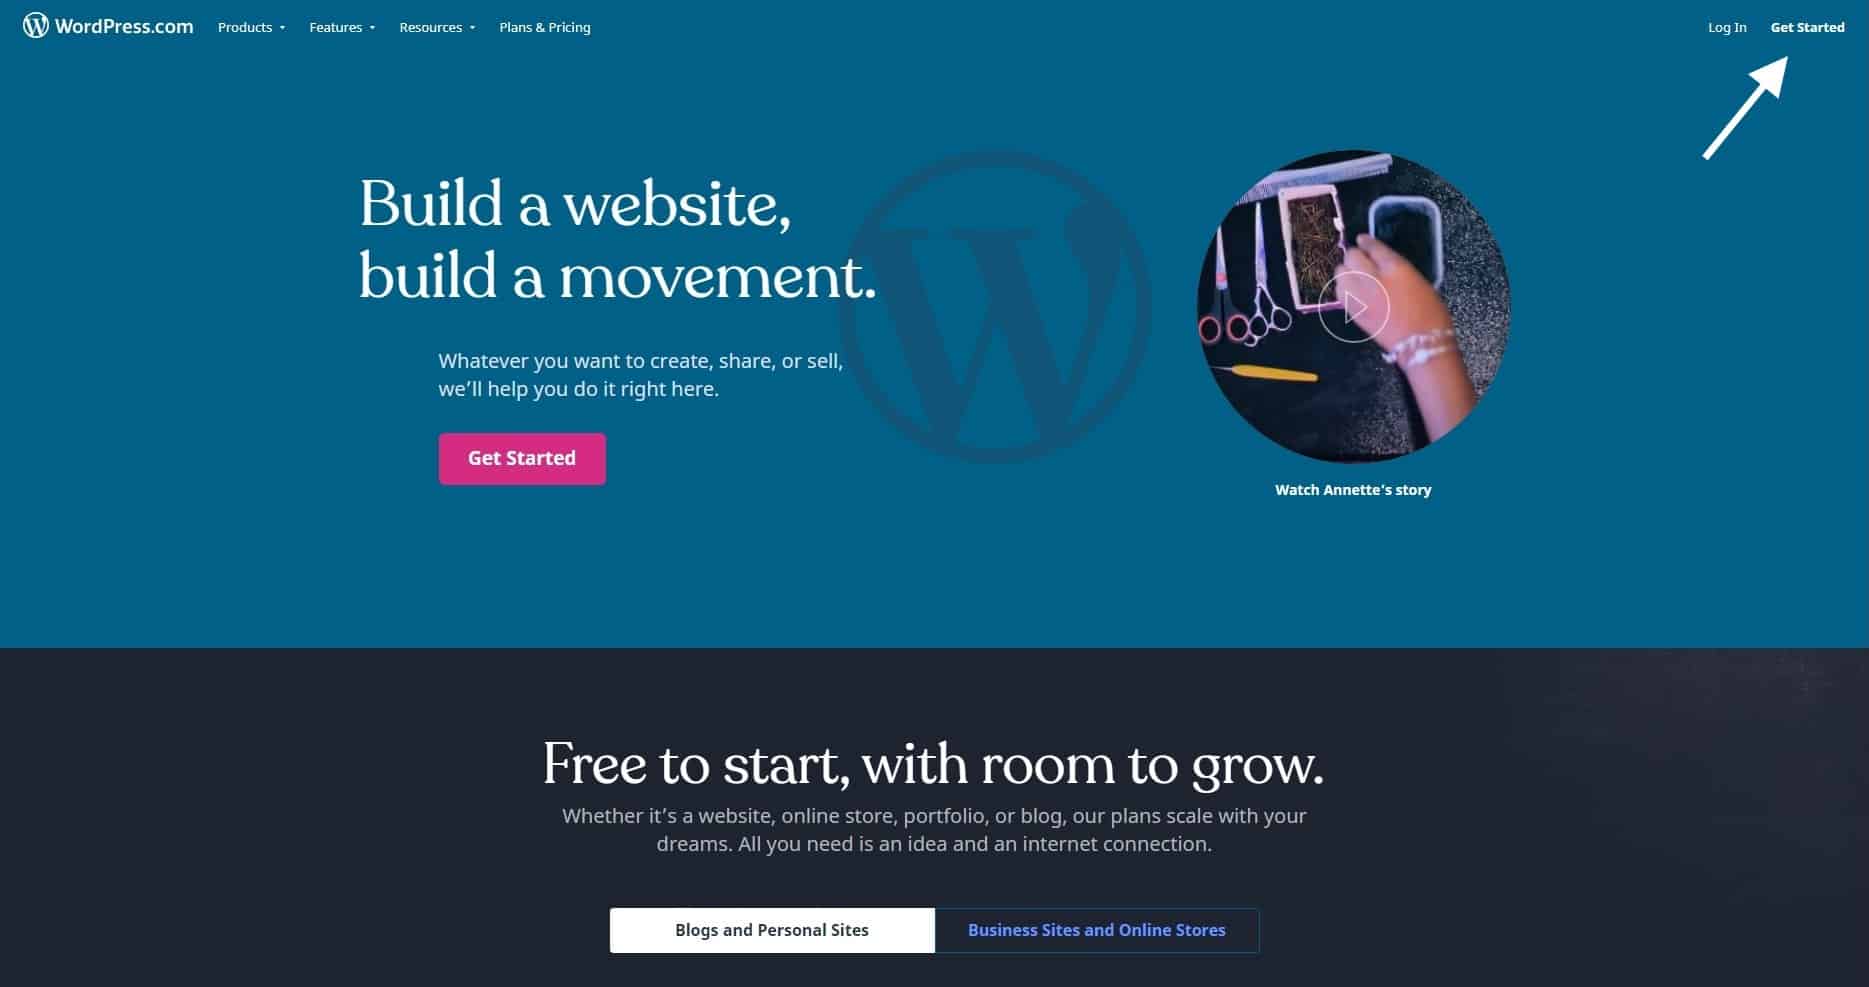 Then fill out the fairly standard registration form with a working email, your preferred username, and a password. Alternatively, you can log in directly with your Google account to save some time.
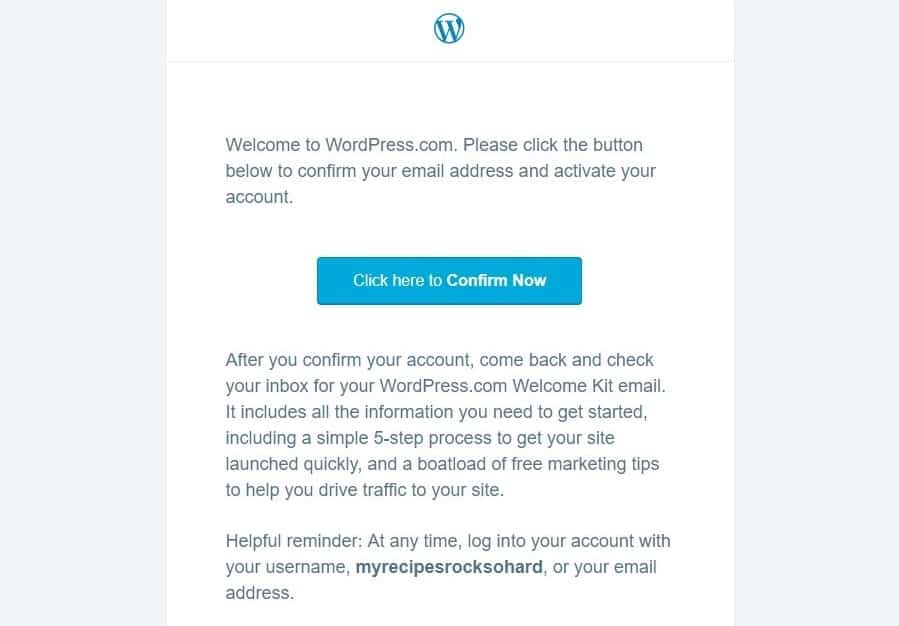
 Now, before you go on to the next step, check the email account you provided. You’ll receive an email with a button that you have to click in order to activate your account and prove that the email address is, in fact, yours. You can technically do this later, but I personally like to get this sort of thing out of the way before I forget. (I forget stuff a lot.)
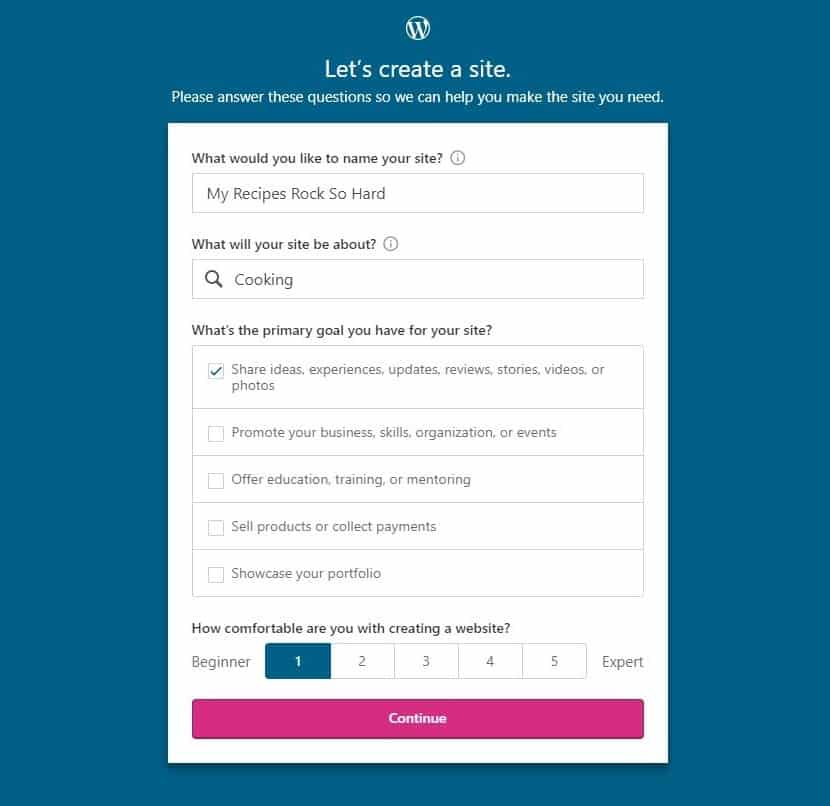
 Clicking that link will take you back to your website setup, where you should fill out some basic information about your website. In my case, I’ve decided that I’m going to share recipes, so I filled out the form accordingly. Eating is a good, universal topic – everybody needs to do it.
I am, for the sake of this example, a beginner at making websites, so I’ve rated myself as a “1” on the scale at the bottom. Based on the number you select, WordPress will either give you plenty of advice and tips for beginners, or let you discover things on your own.
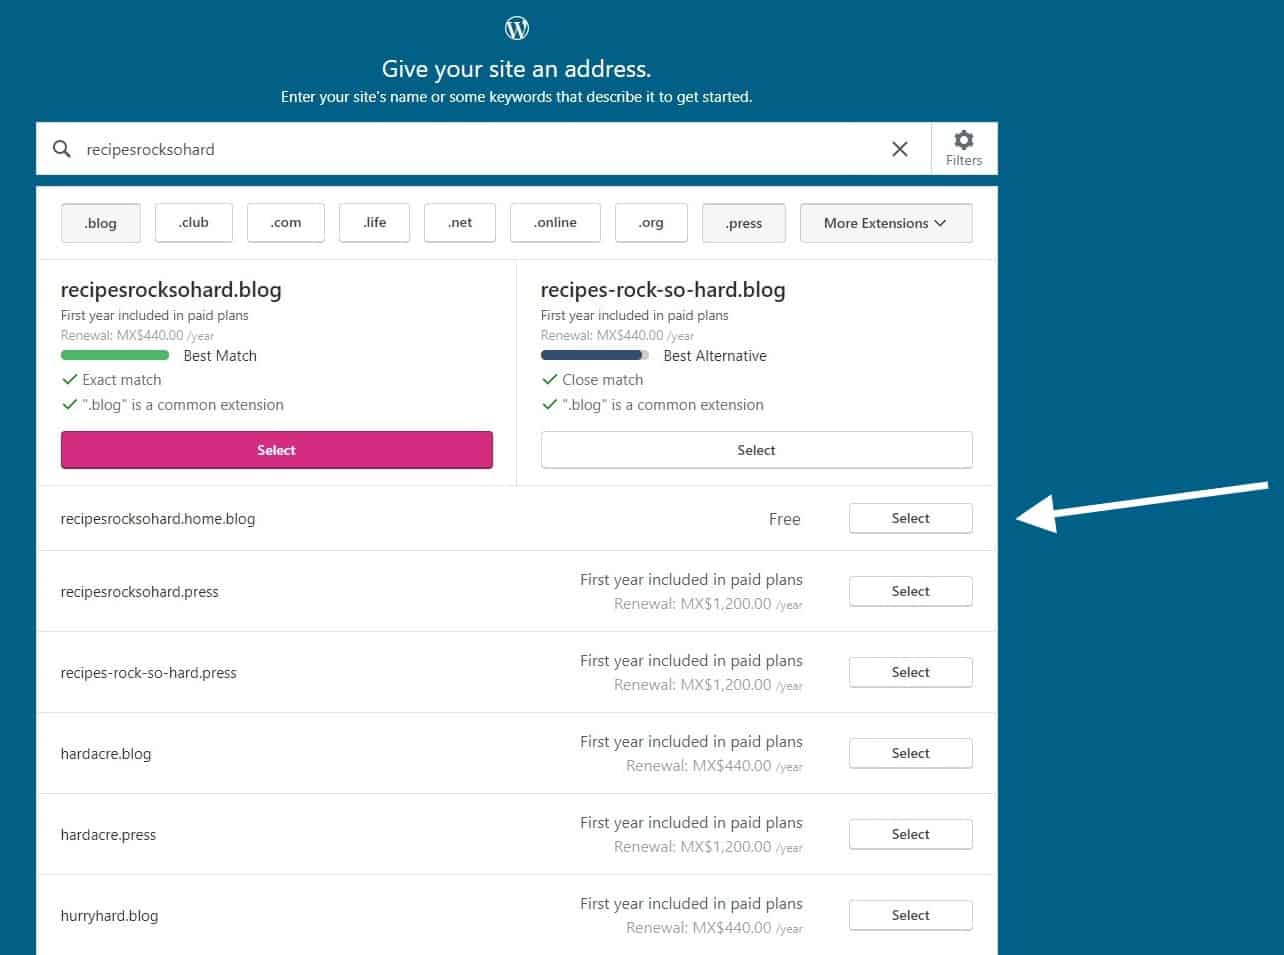
 Next, you’ll have to choose an address (also known as a URL) for your website. For example, recipesrocksohard is available here. Now, unless you want to spend money on your own domain name, you should just pick the free option near the top.
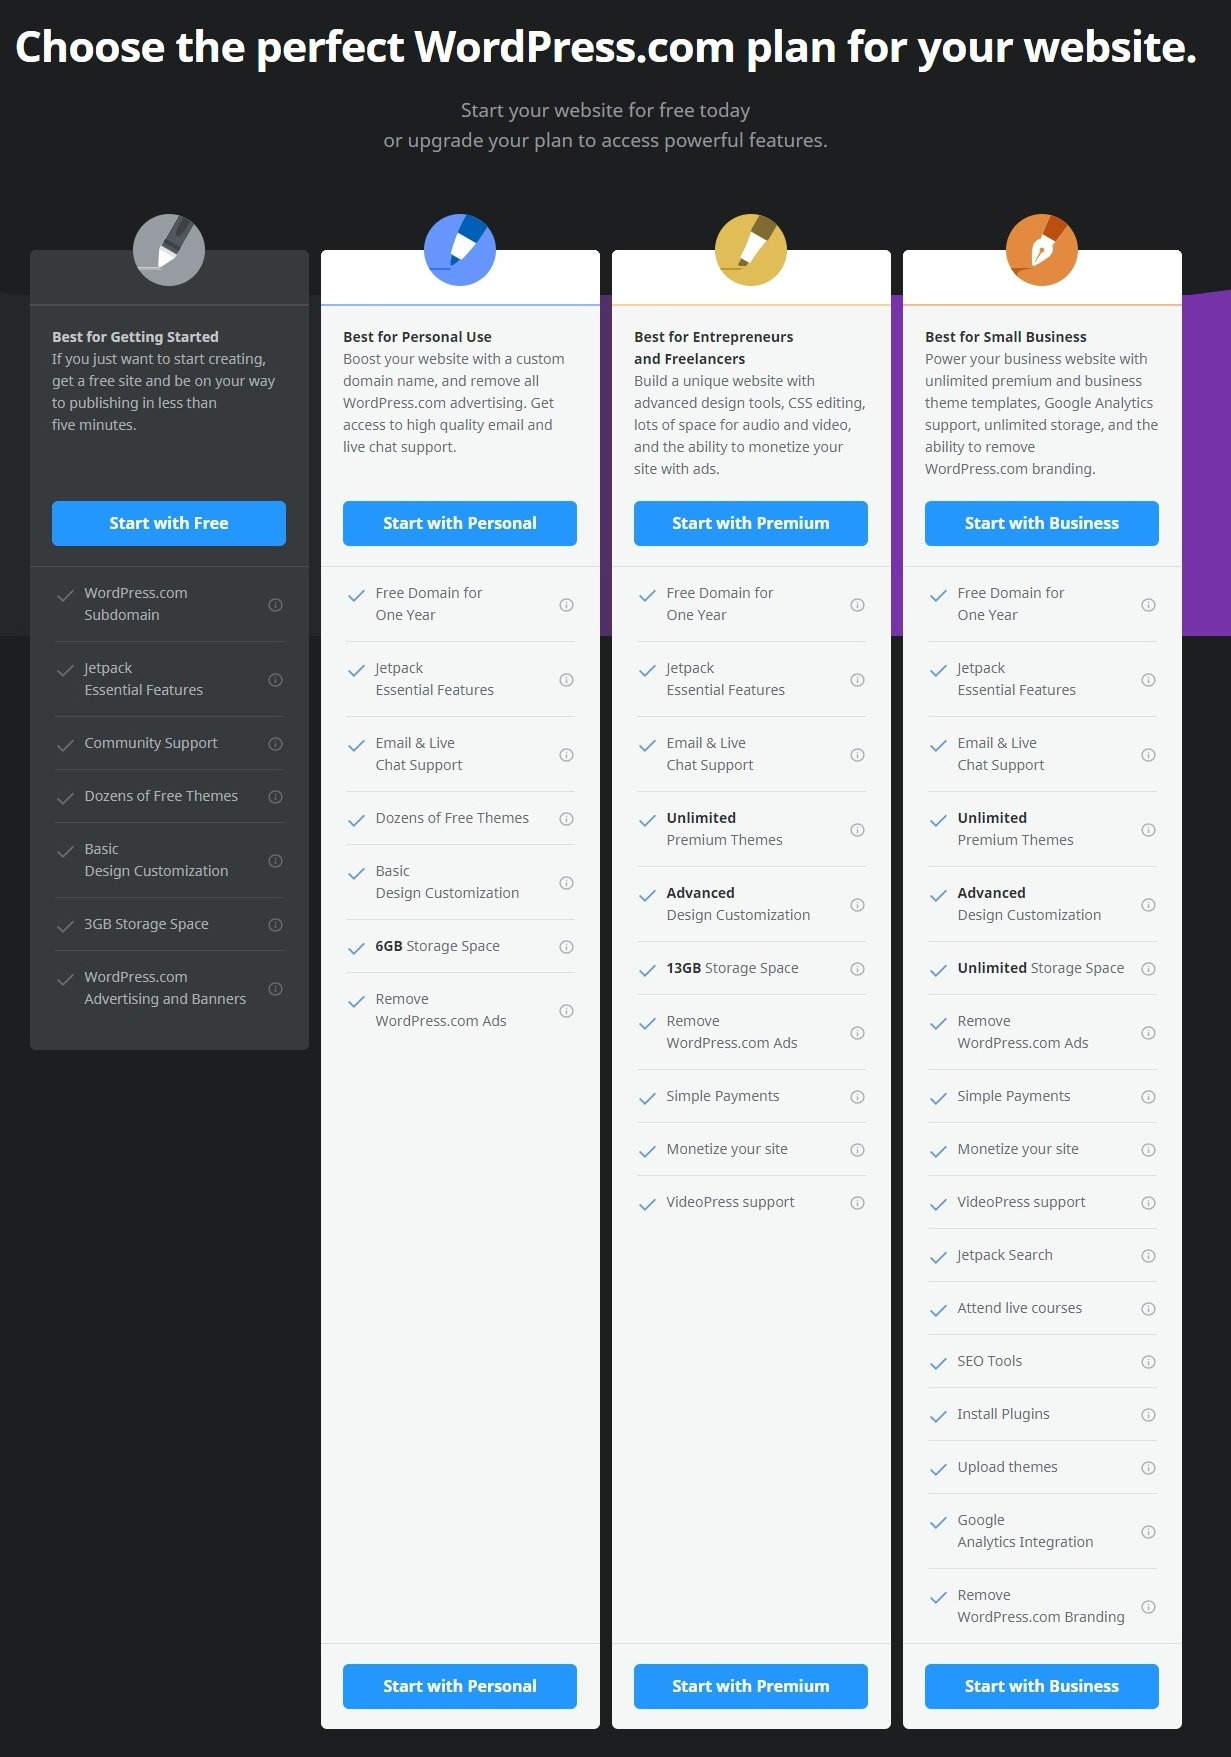
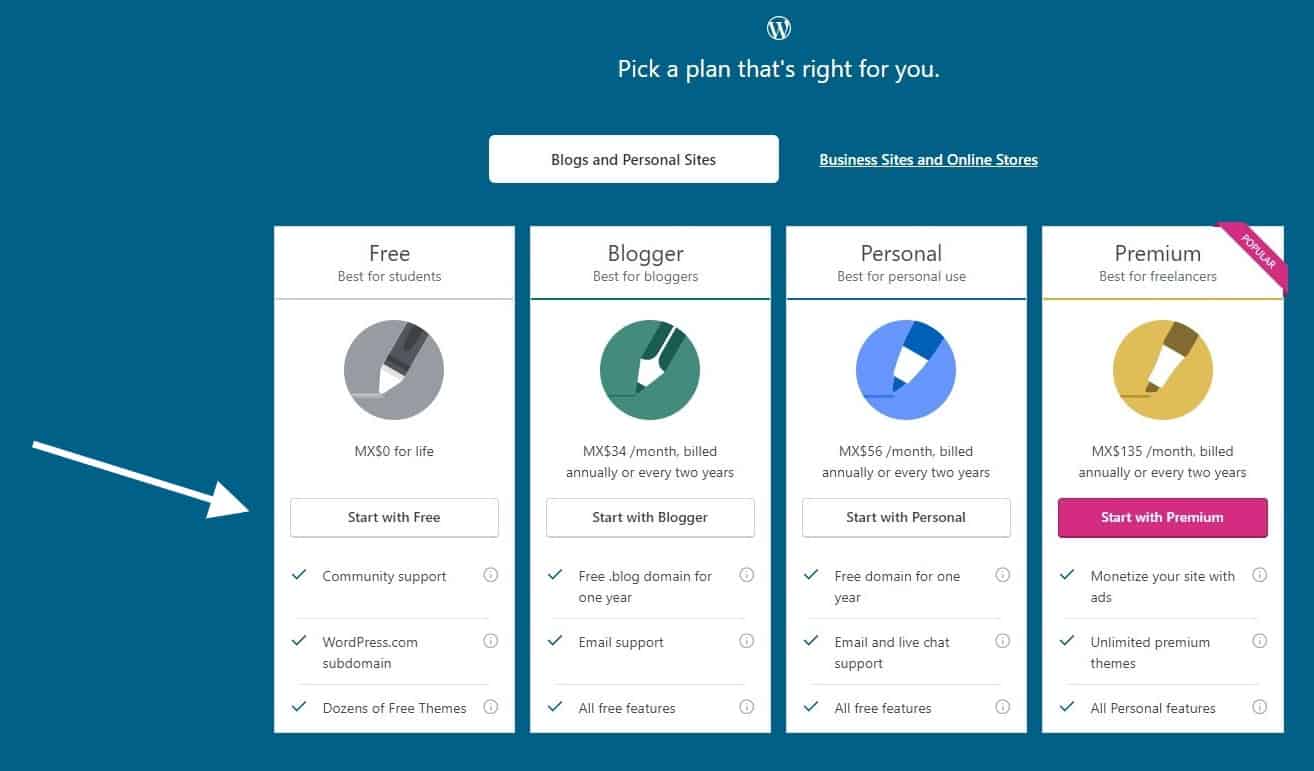
 On the next screen, you’ll need to pick the free plan.
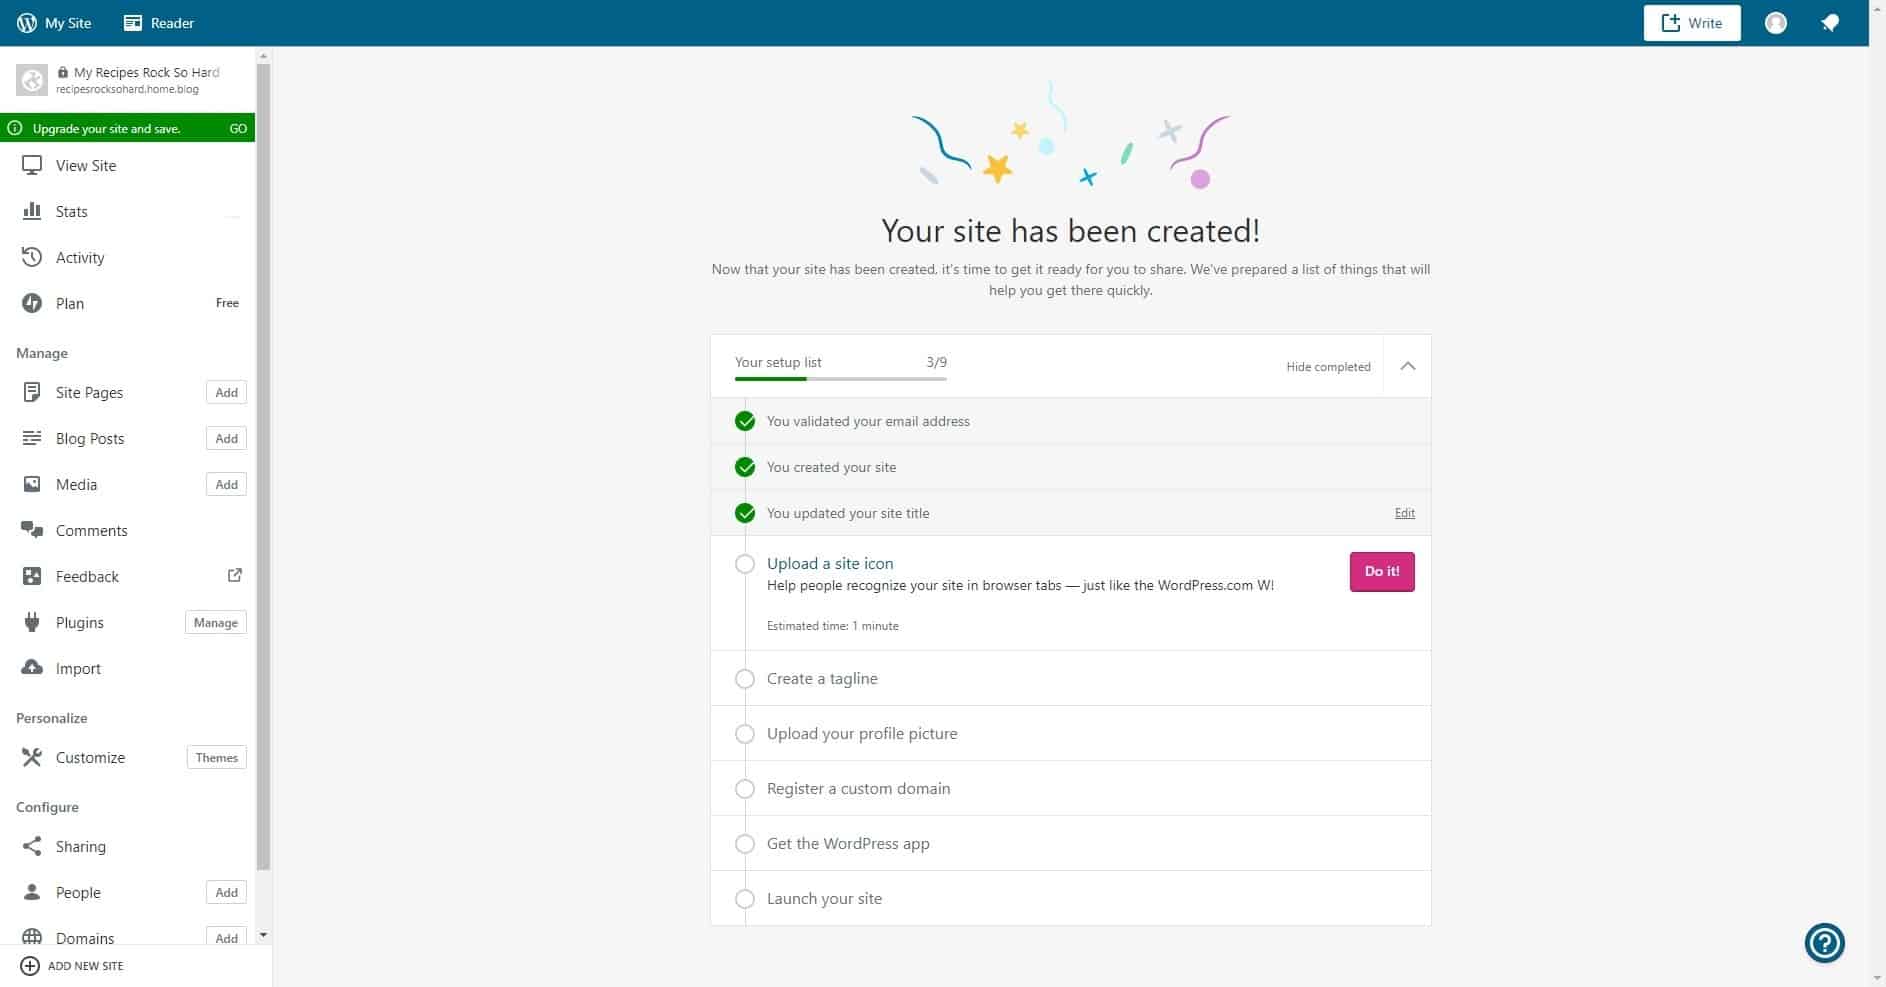
 And that’s it! You should see a message congratulating you on the successful creation of your blog. There’s a short checklist there of things that are good to do, but not immediately essential. Well, perhaps you should upload a profile picture, but the rest can wait.
Basic Content Management
All right! The blog is up and running, but there’s nothing to read. Well, it isn’t officially “launched” yet, but you really want to put in some content before you let anybody else see your website. But before we get started on that, let me quickly explain to you the difference between “posts” and “pages” in WordPress.- Posts are just that, your blog posts. They’re the bits of content that will show up in reverse chronological order, and you’ll spend most of your time on these. Enough said.
- Pages are more static, and they’re typically always visible to the user in the navigation bar. That’s where you put things like your contact information (“Contact Us”), your personal story (“About Me”), and that sort of thing.
Writing your first post
To get started on our very first recipe, we’re going to click on either the “Add” button in the left-hand menu, or the “Write” button on the upper-right corner of the screen.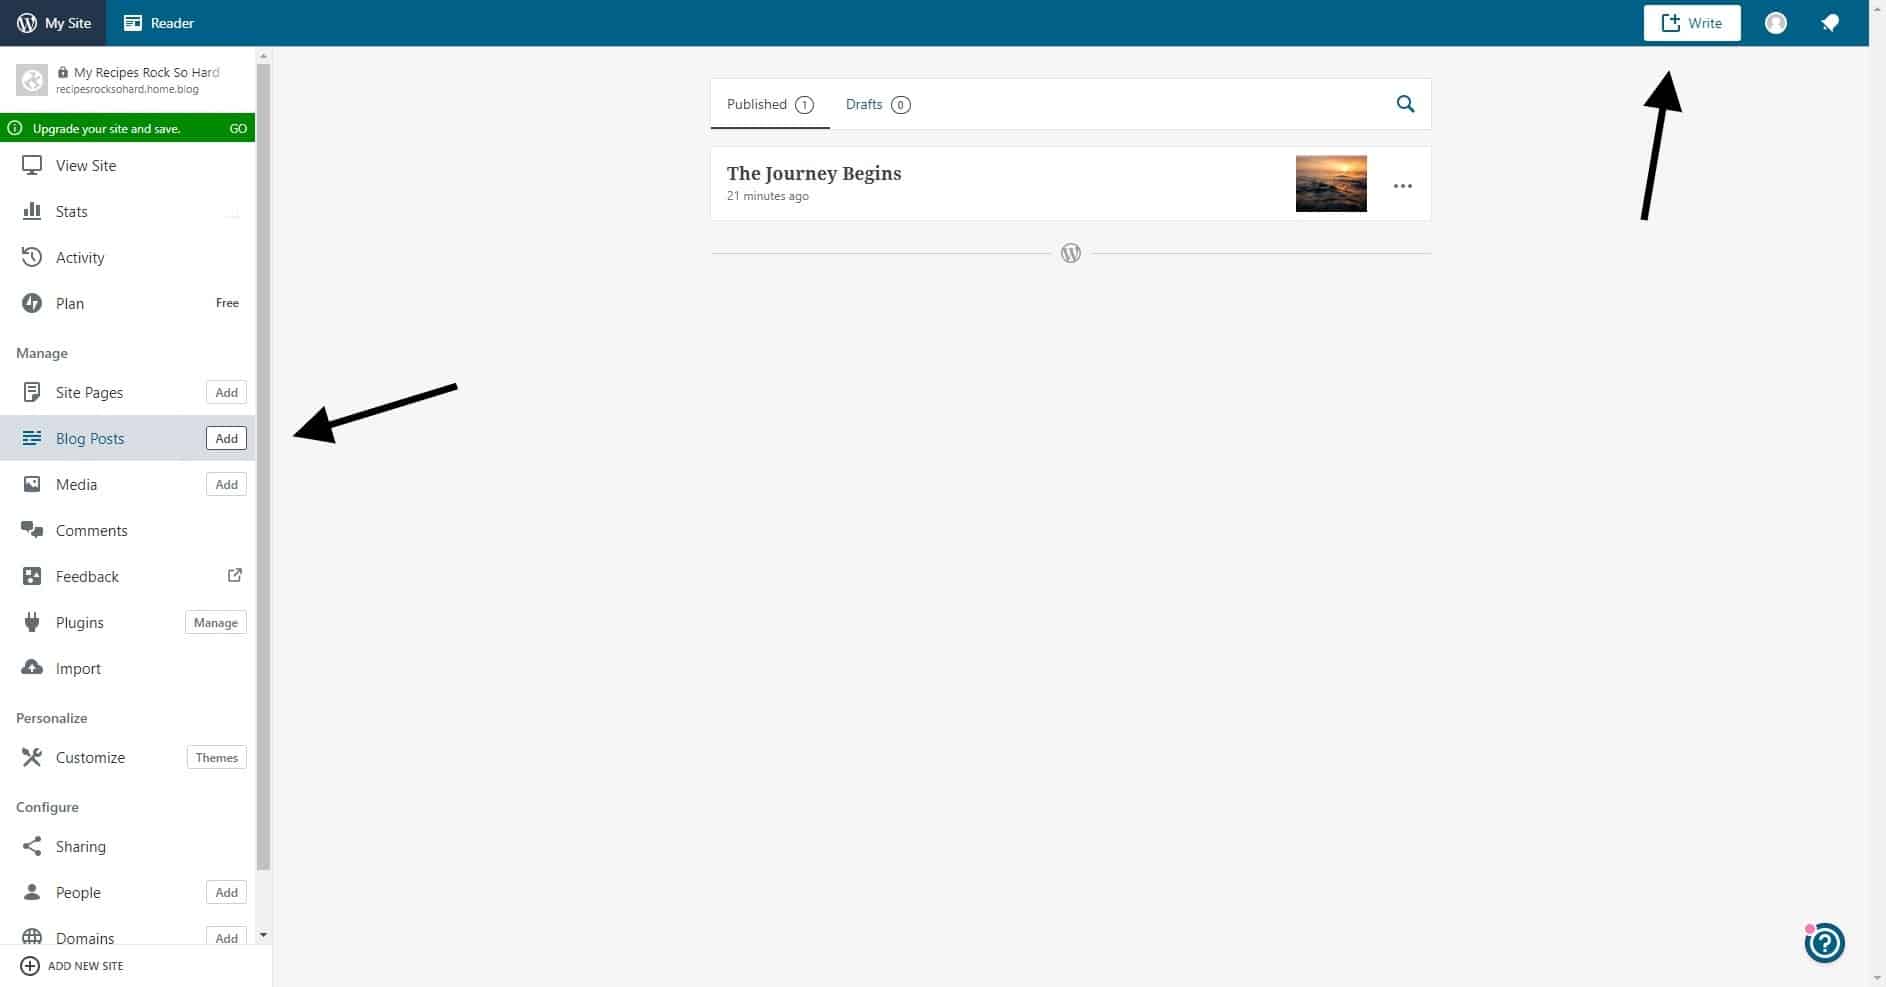 Then, just start typing! The big text at the top is your title, and everything below is the content of the post itself. The latest version of the content editor splits all of your content into “blocks.” Every paragraph, every image, and everything else is its own “block,” and all the blocks can be moved to other parts of your post at will.
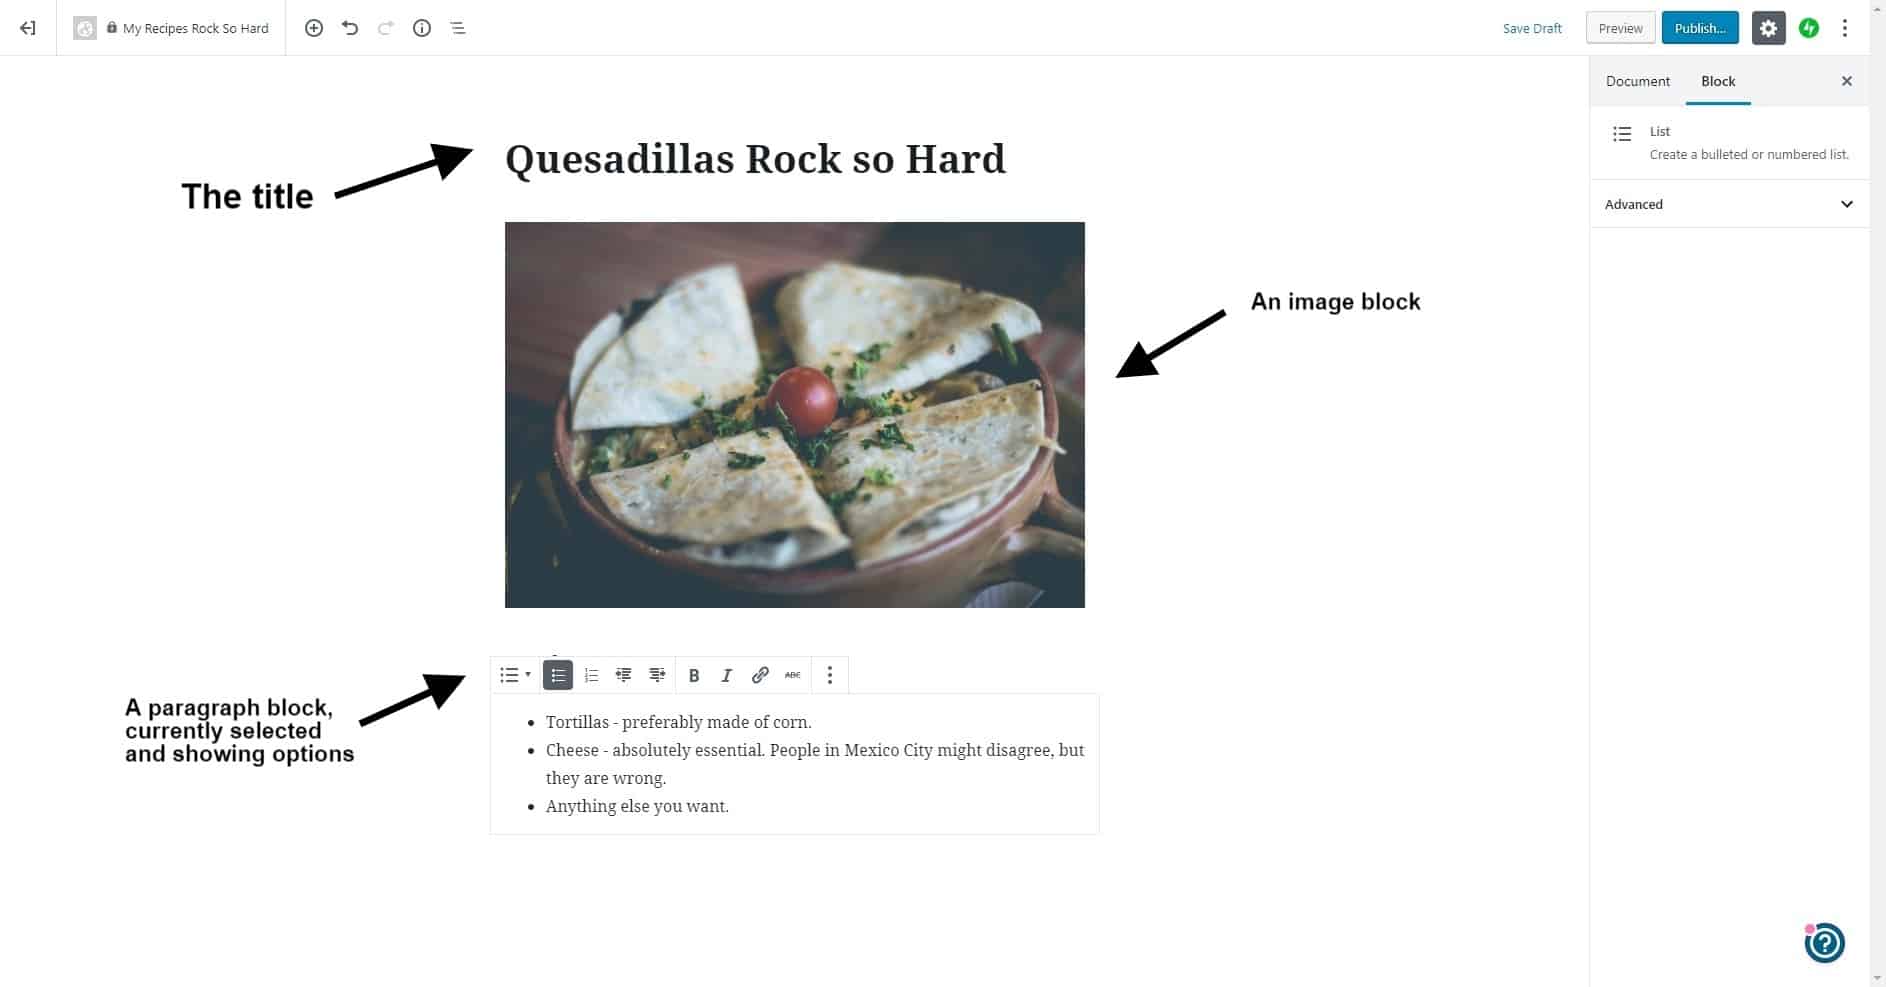 When you’re done, just hit the blue “Publish” button on the upper right. You’ll be asked if you’ve got everything ready, and are satisfied with your post. Hit the button again to complete the process.
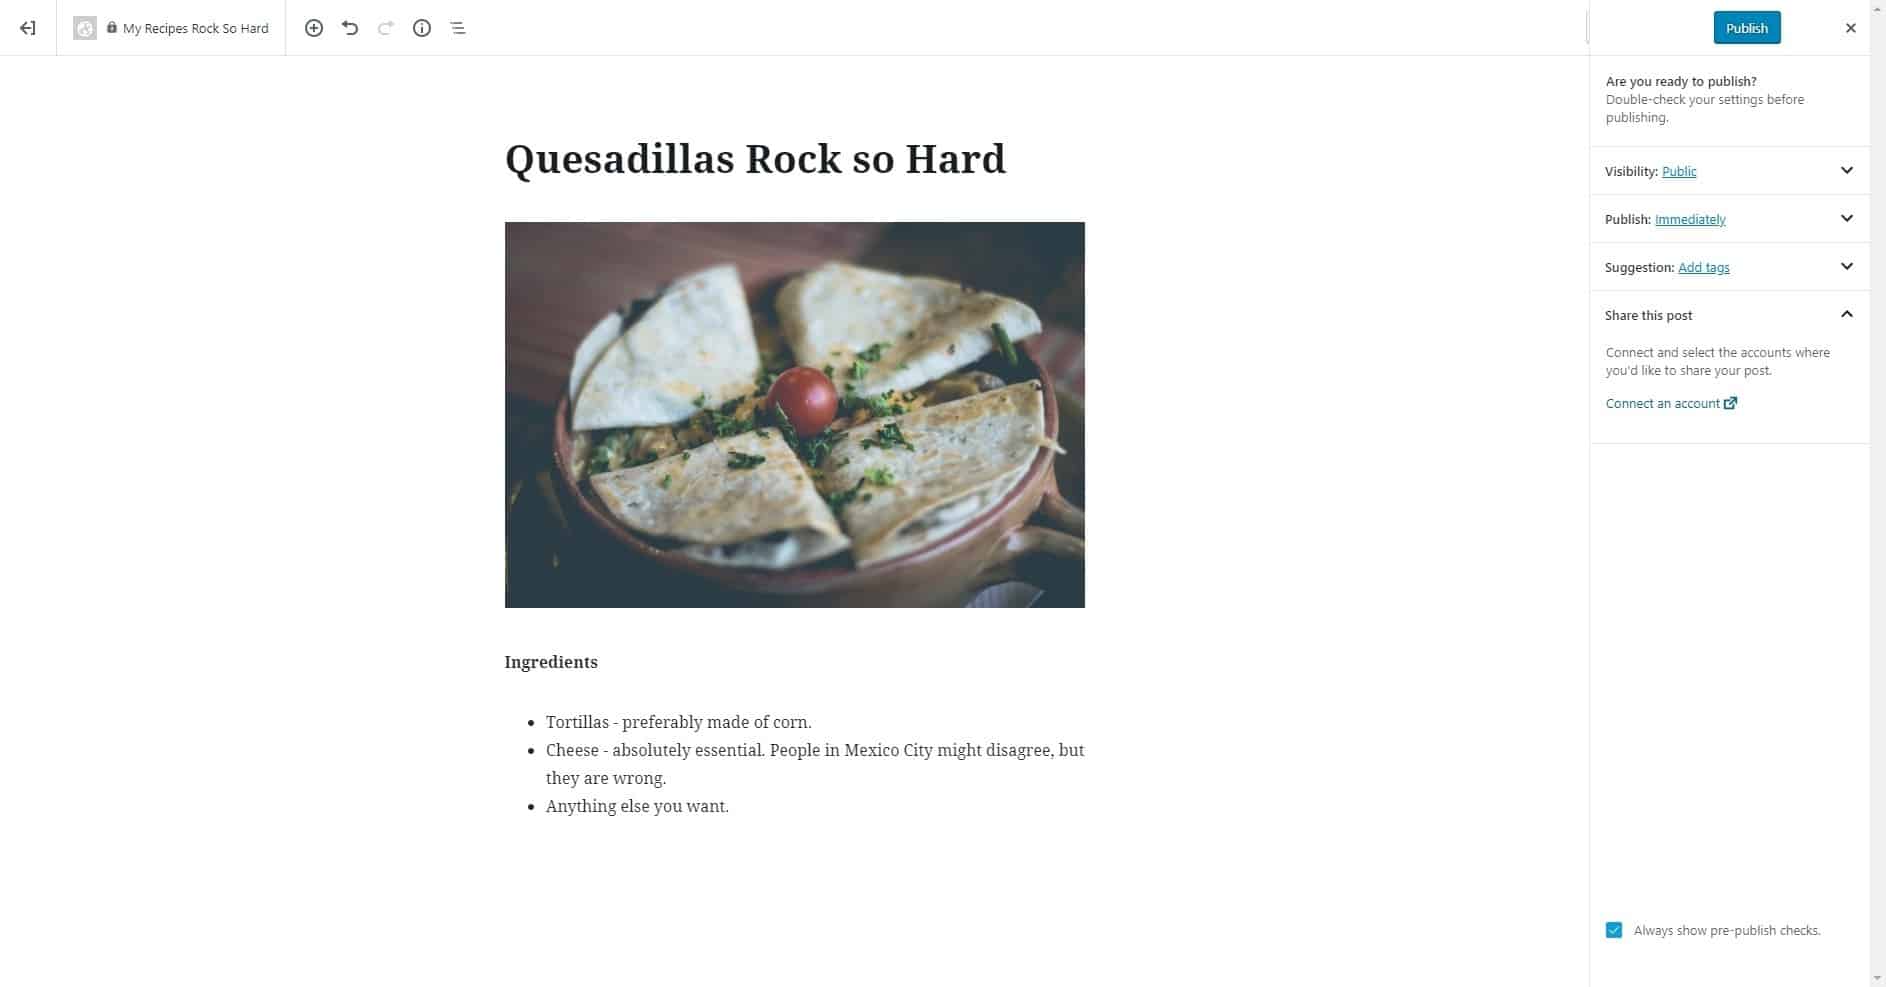
Confirming that all is well.
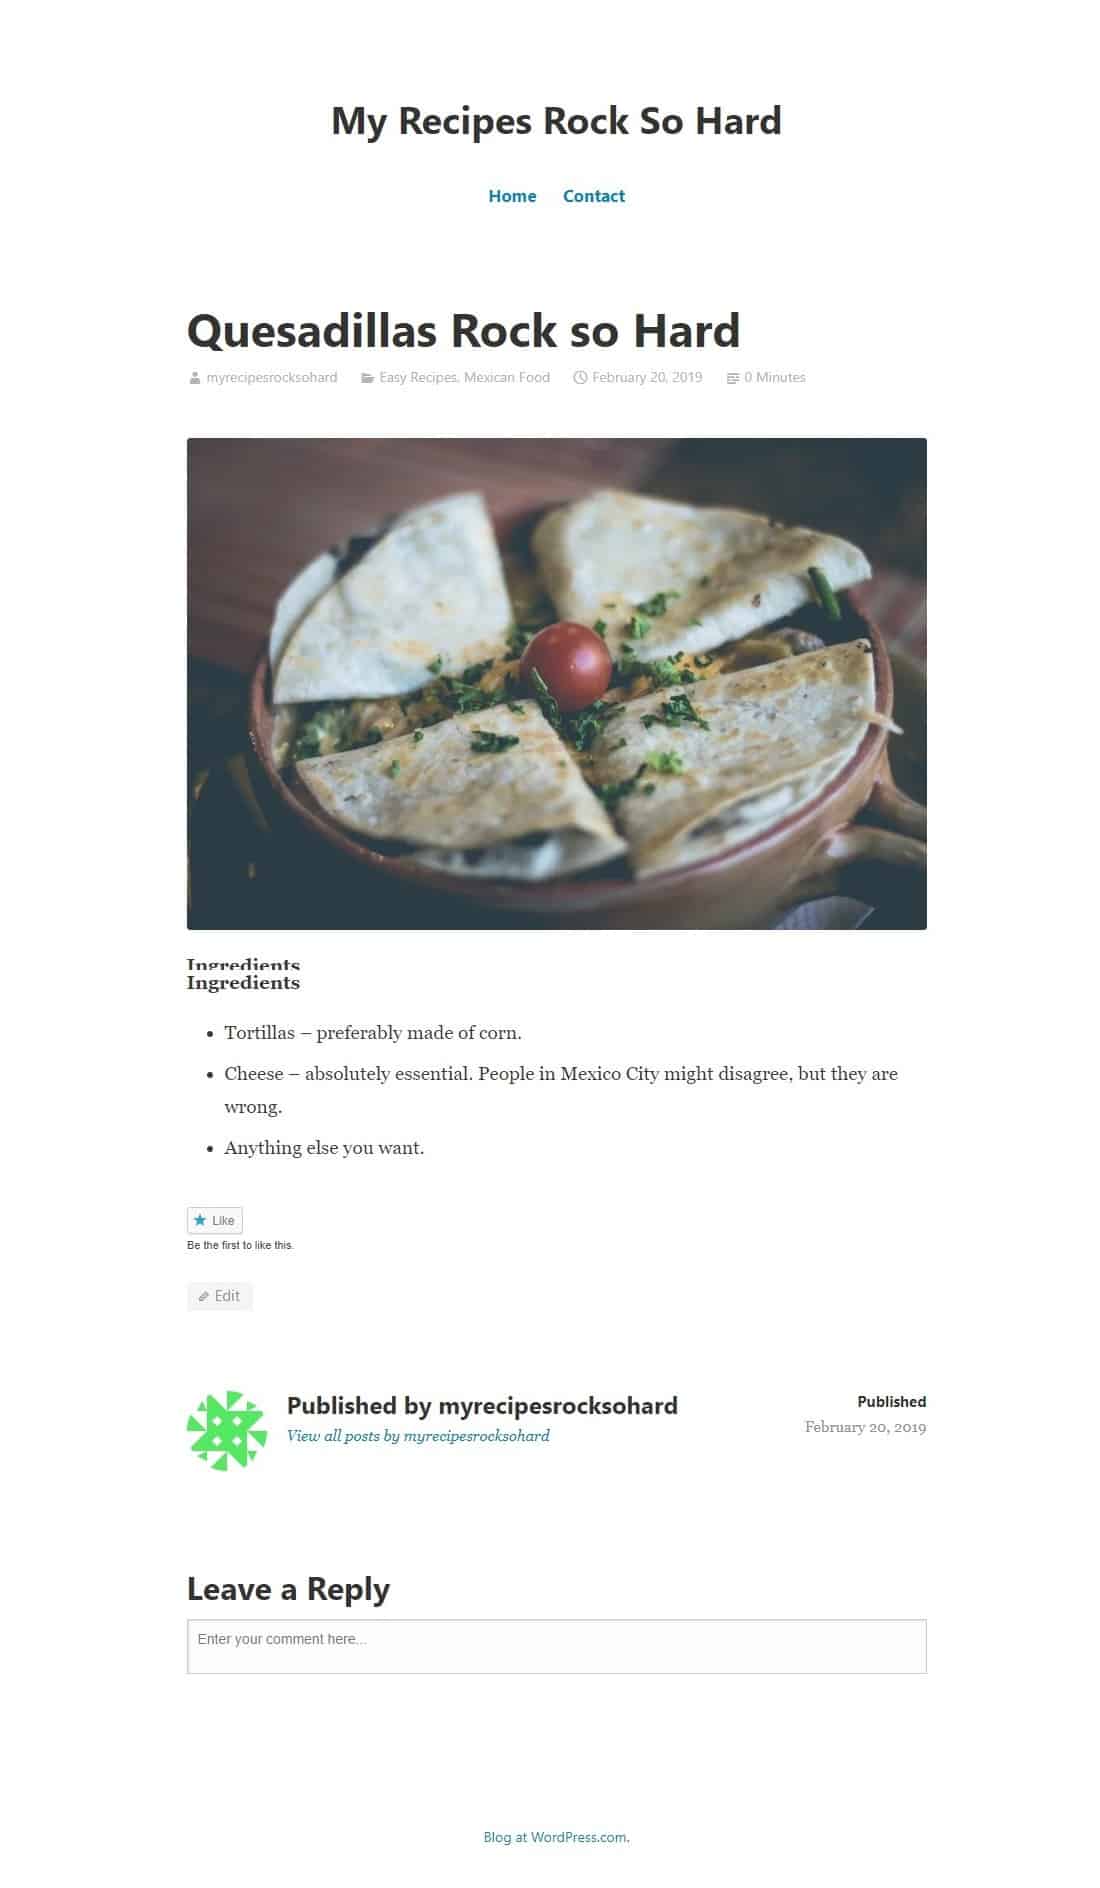
The finished post, as seen by the user.
Organizing your posts
When you write a lot of blog posts, it’s good to keep them categorized and organized. This is so you can find them again whenever you want, but also so that if a visitor likes one post (in this case, a recipe), they can find others like it. The main tools used to organize your posts are “Categories” and “Tags.” Categories and tags are also good for search engines, meaning that people will be able to find your posts more easily.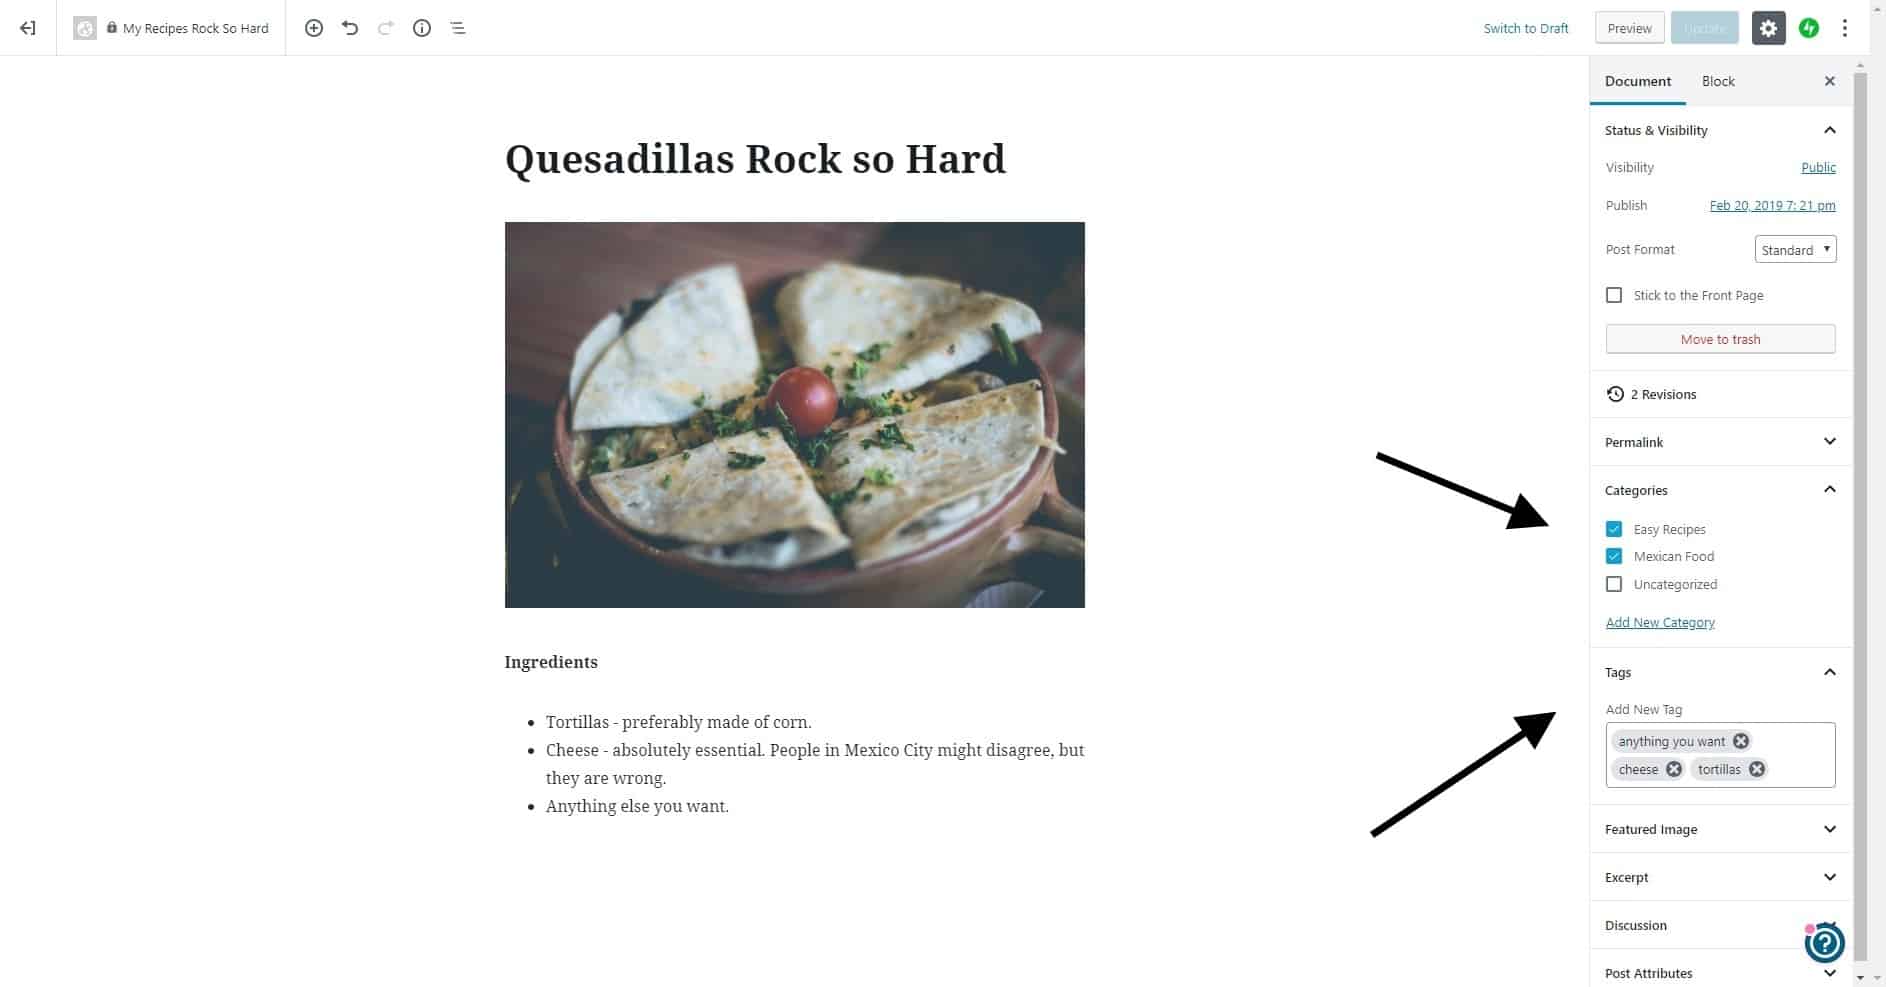
Tags and Categories can be added from the post-creation screen.
Categories are meant to be broad, not overly specific. So in our case, categories might include: Mexican Food, Greek Food, Easy Recipes, Hard Recipes, Oven Recipes, and so on. A recipe might fit into more than one category, but usually won’t fit into a lot of them. Categories are also hierarchical, which means you can have “parent categories” and “child categories.”
- Mexican Food
- Quesadillas
- Gorditas
- Tacos
- Carne Asada
- Greek Food
- Yogurt
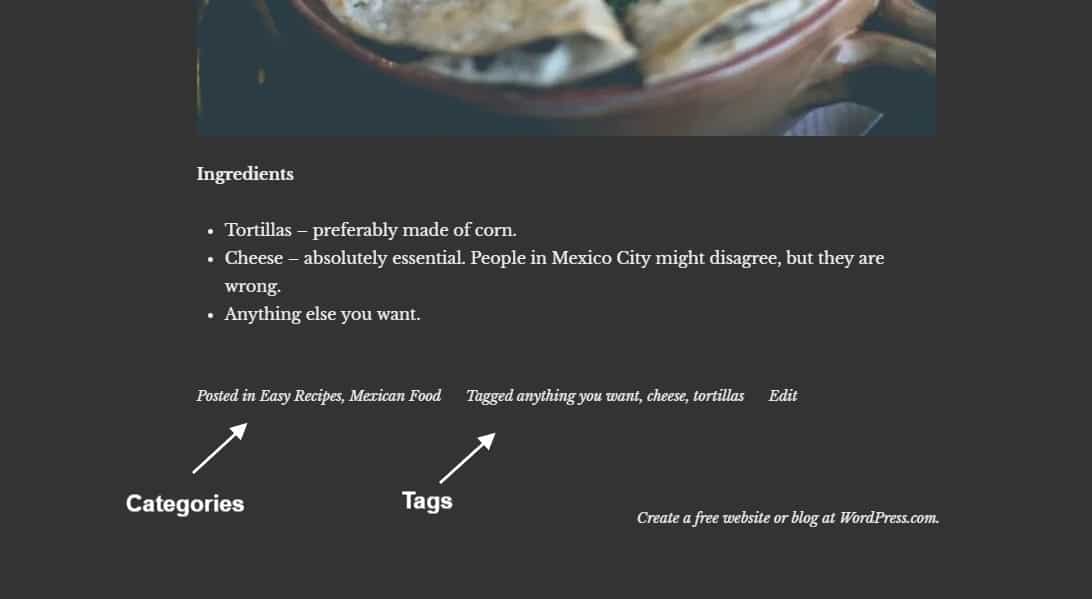
How categories and tags look on the front end with the “Libre 2” theme.
You can add new categories and tags from the post creation screen. There does not, at present, appear to be a way to edit or delete them on WordPress.com (at least, not in the free plan), which is strange because the feature is available in the self-hosted version of WordPress.
Themes
Themes are basically alternate designs for your website that allow you to completely change the look, feel, layout, and colors of your blog. You can choose one to match your existing branding, or go wild and try something new. To get started, click the “Themes” button on the left. Yeah, click the tiny little button. Don’t click Customize just yet. Then, make sure you select the free themes to get you started.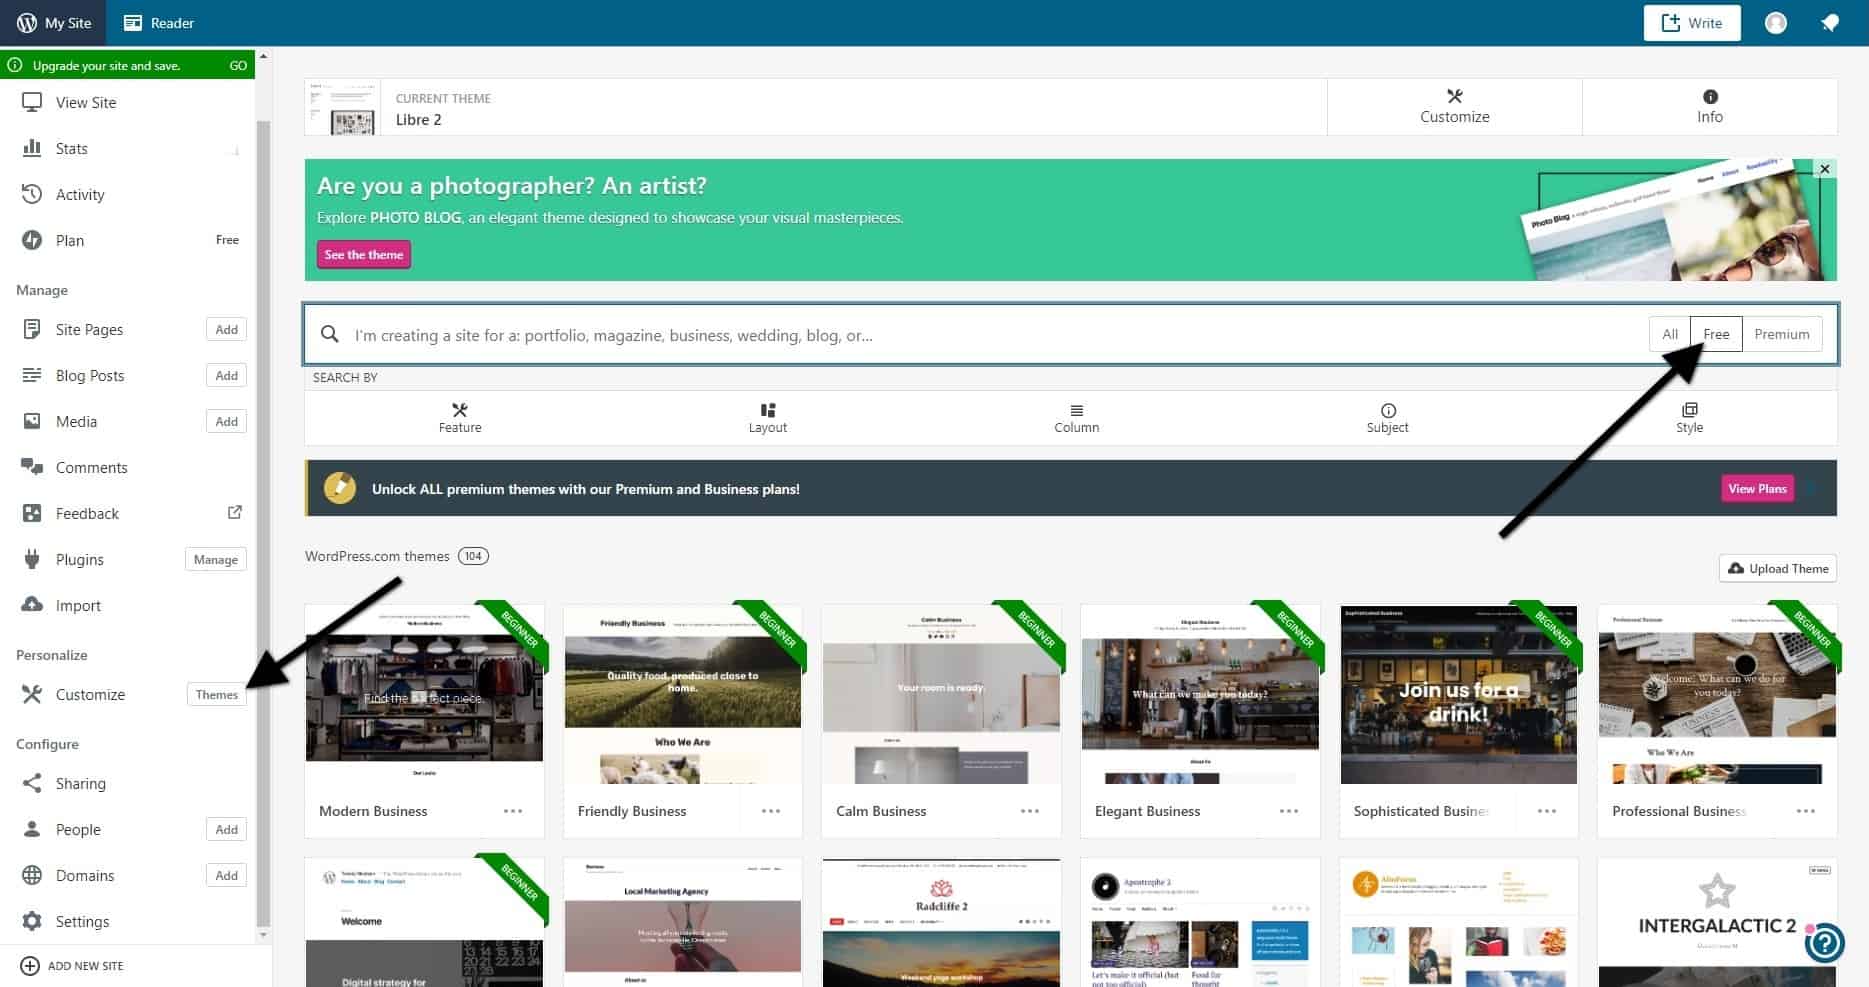 Once you’ve selected a theme you like, then you can click “Customize.” This will take you to a screen where you can change various options like the colors in your theme. Play around with this. Click the “Publish” button on the left to save your changes. If you don’t like the changes you’ve made, just don’t click it.
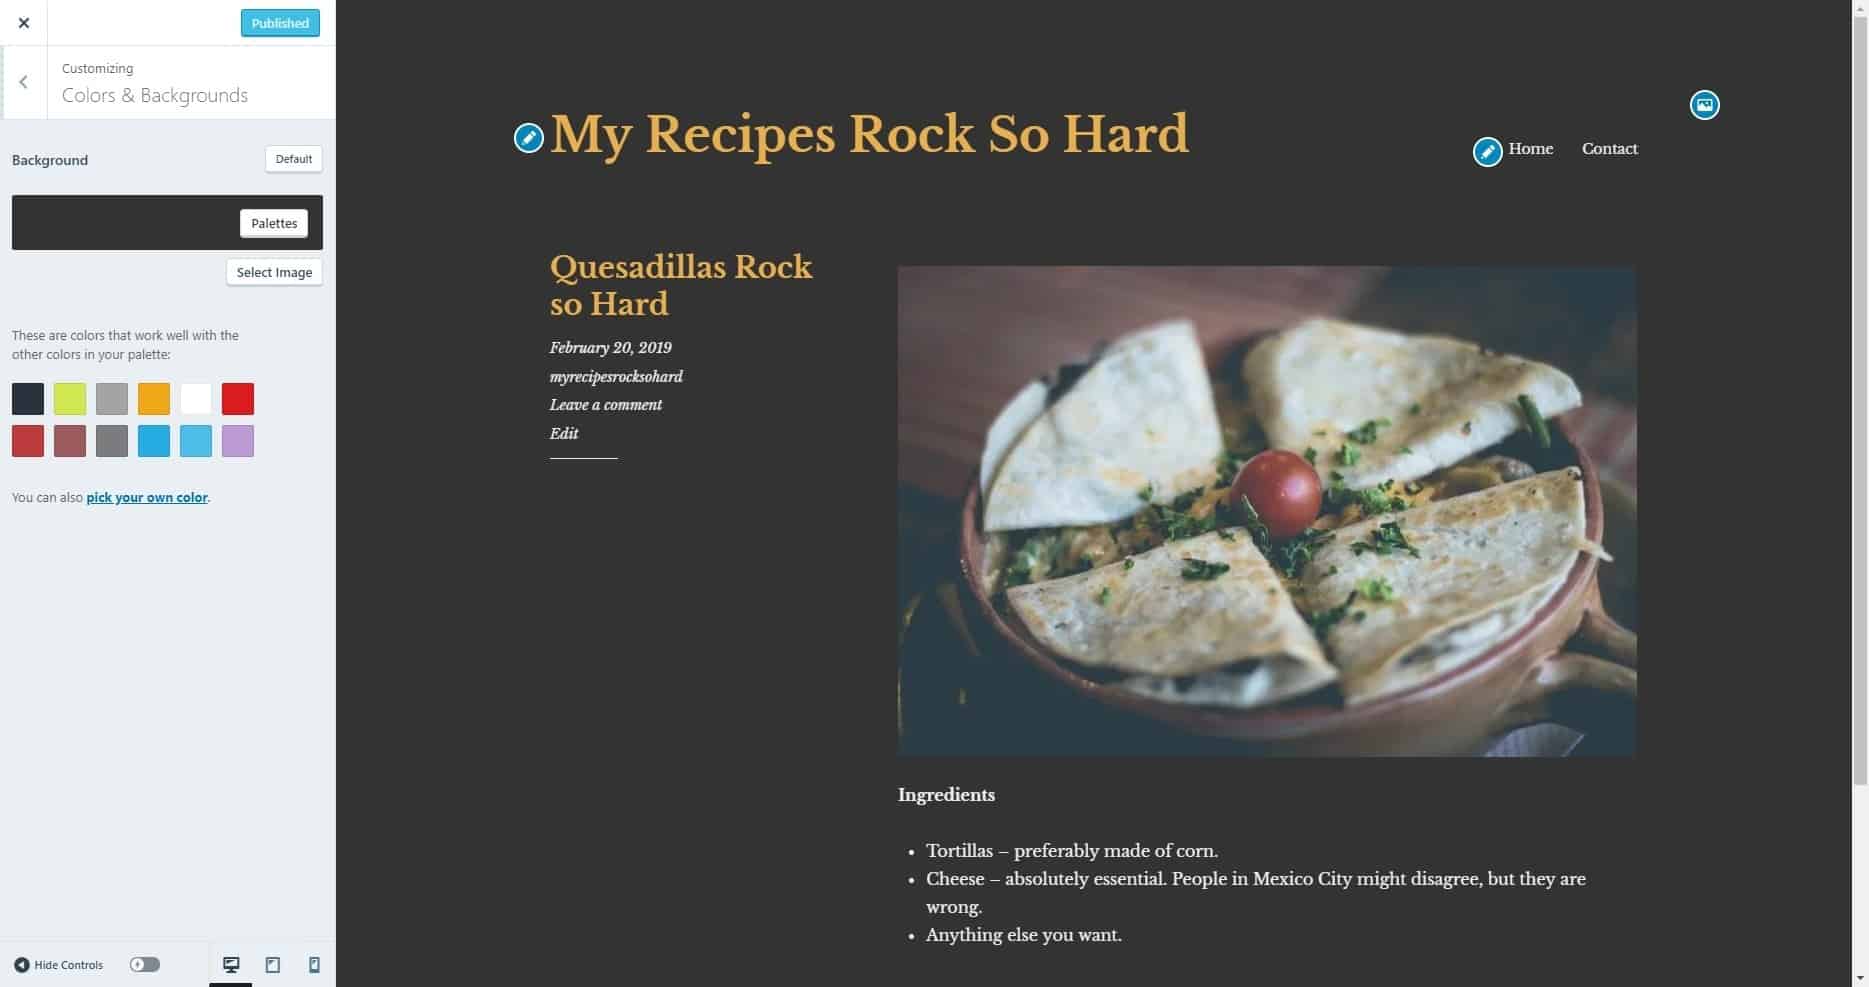
Customizing the Libre 2 theme.
Plugins
Now, plugins are interesting, but they’re not available in the free plan. You have to upgrade to the Business plan to get them, but you should know what they are. Basically, plugins extend the functionality of WordPress. They can add contact forms, new layout options, online stores, or transform your blog into a public forum. They can do just about anything a programmer can think of, and there are loads of them. But as long as you’re running on the free plan, don’t worry about plugins too much. Focus on learning what WordPress can do on its own.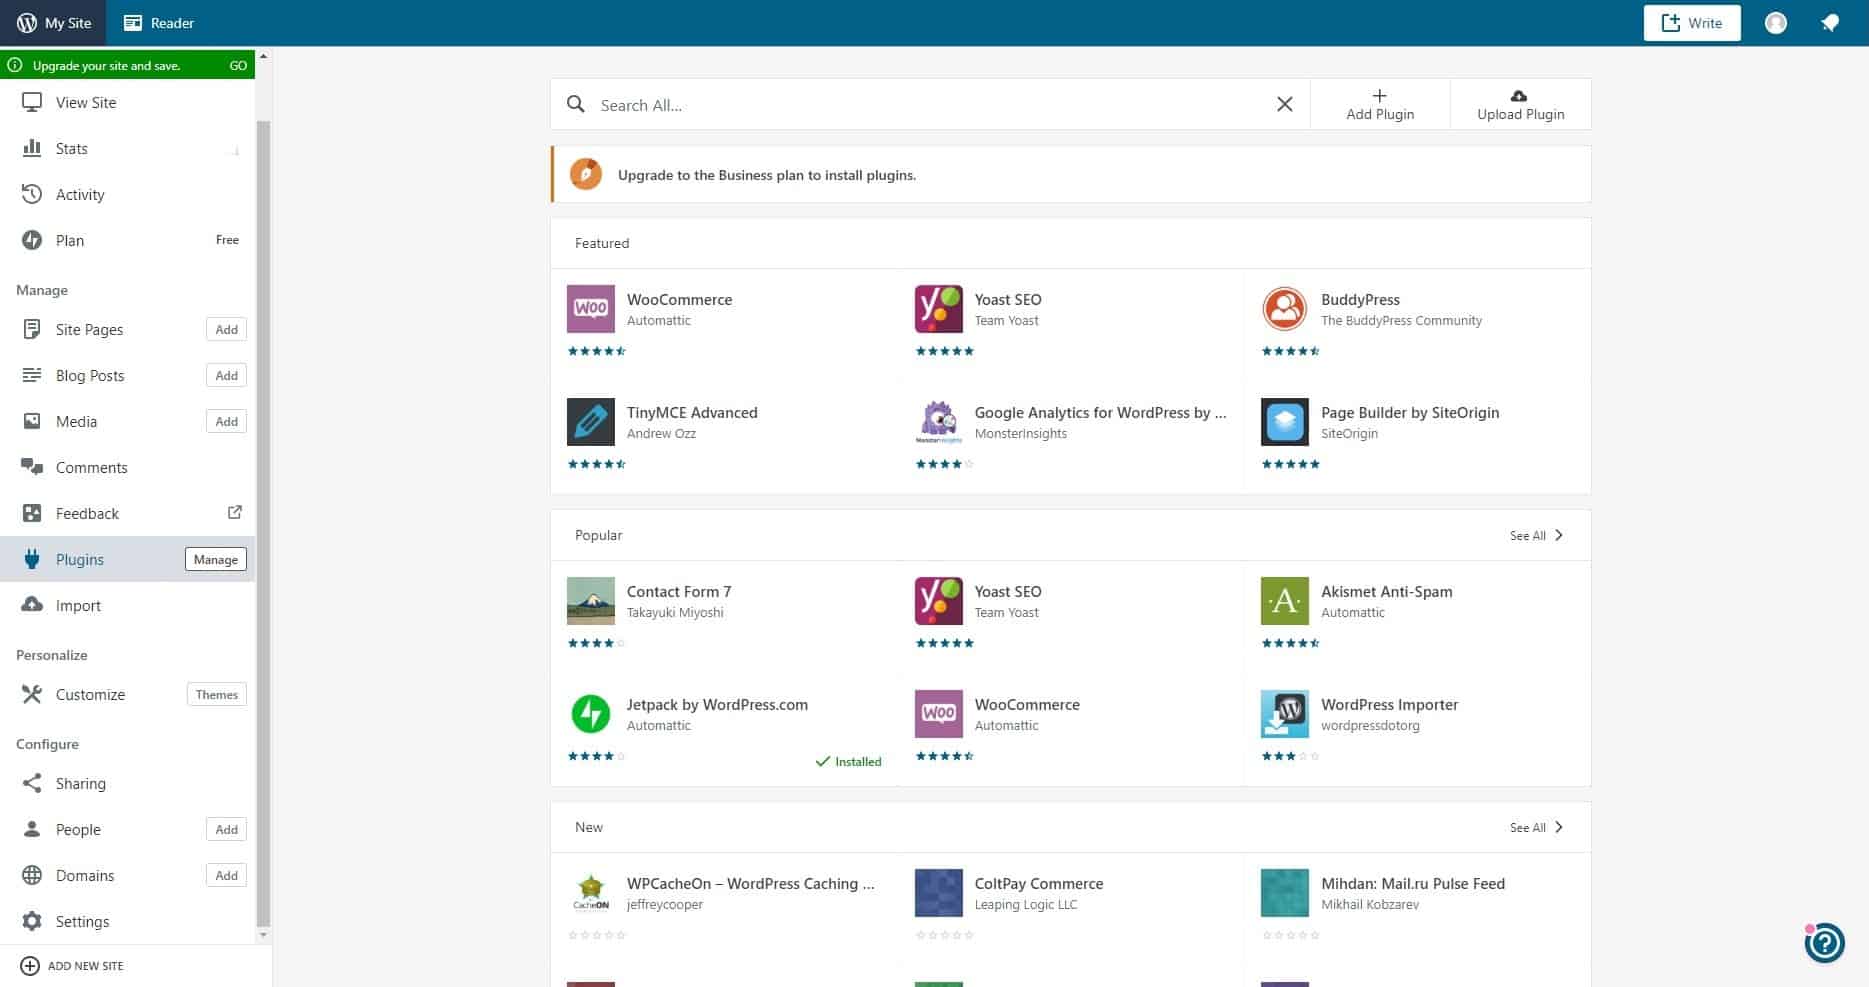
Launch
And here we are, at the very last step. Now that you have some content, and perhaps have chosen a theme for your website, it’s time to get back to that checklist from earlier. You can complete as much of it as you like (you don’t need to register a custom domain, or download the app), but the important part is to click the bit at the bottom of the checklist that says “Launch your site.”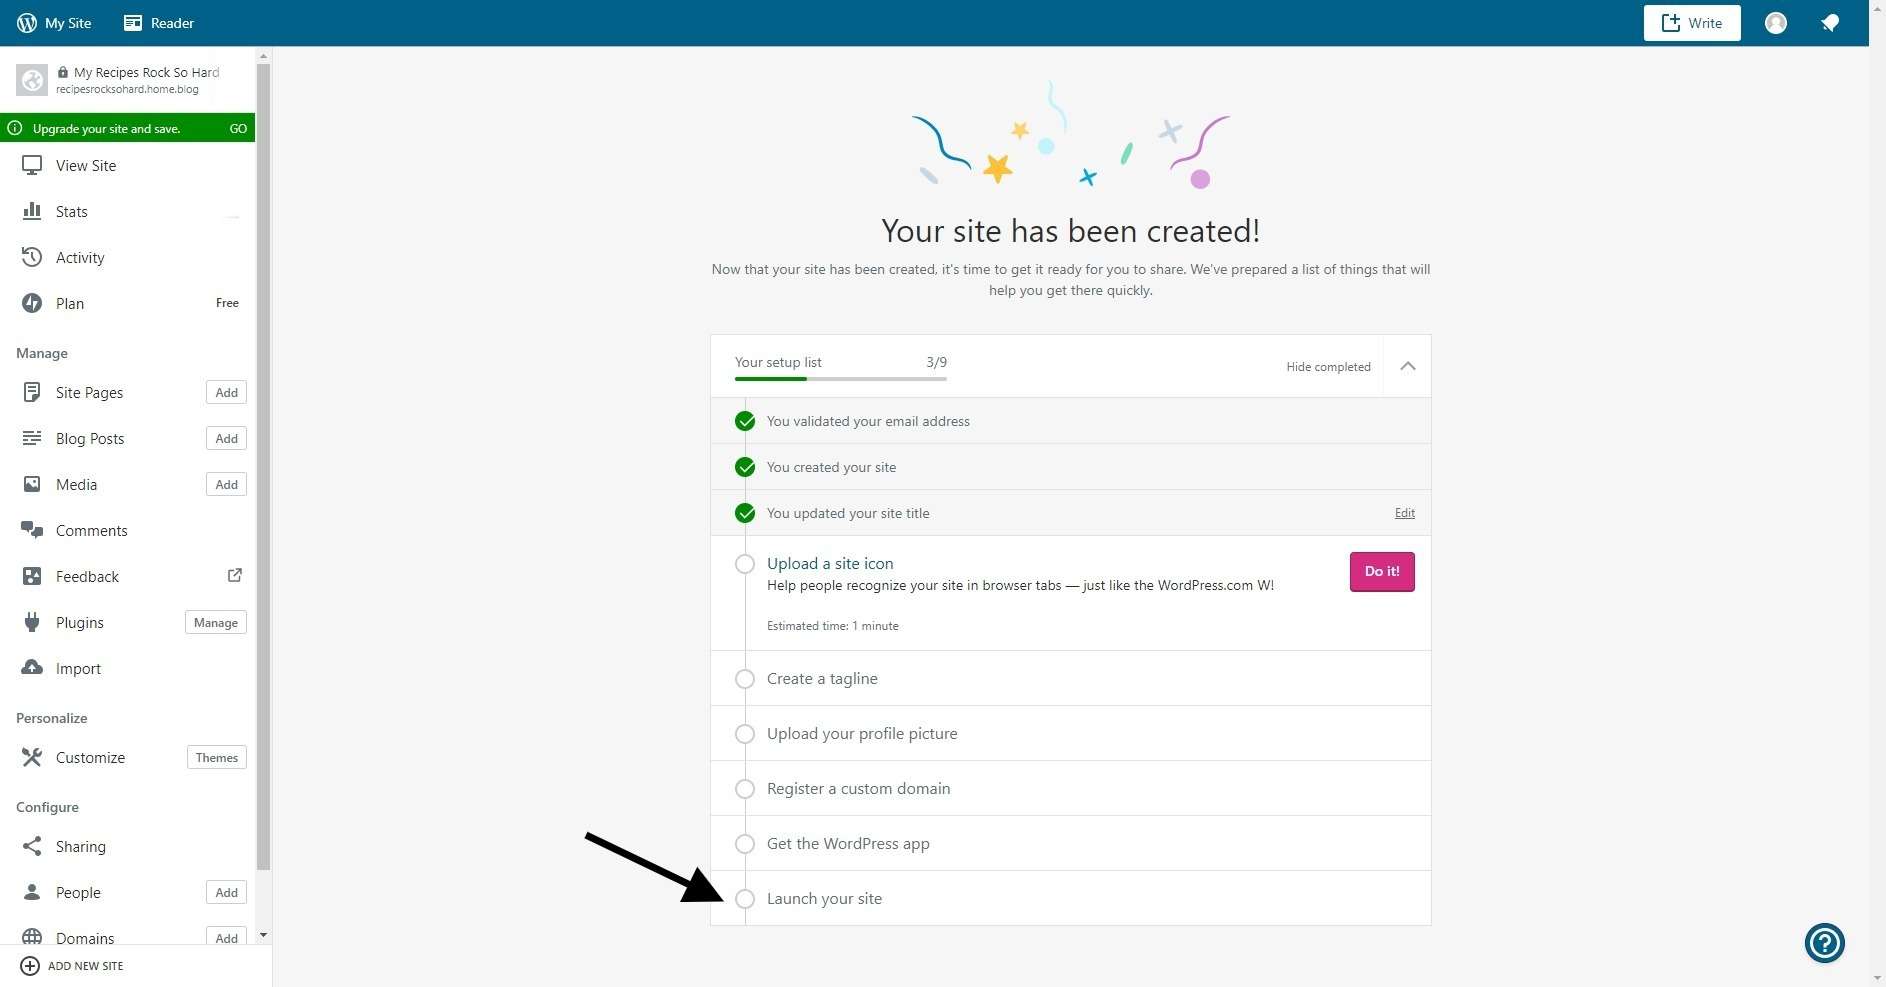
Upgrading, and Its Benefits
Now that you have a free blog up and running, why would you ever want to spend money on it? Well, here’s the thing: Once you have a lot of visitors coming, you might want to expand your website’s functionality, you might want more personalized branding, and you’ll definitely need more storage space for all those lovely pictures of food. Oh, and you get a custom domain name, such as “recipesrocksohard.com”, as opposed to “recipesrocksohard.home.blog”. Paid plans provide all of this and more: they also remove all WordPress ads, give you access to more themes and customization, and are easier to monetize. You’ll also be able to upload themes from third-party websites, such as the official WordPress theme repository, or get premium themes from sites like ThemeForest. As for plugins, you’ll be able to install things like Yoast SEO to give your website a small search ratings boost, or Contact Form 7 to create more advanced contact forms. If you run events for your community, you could install something like The Events Calendar to keep everyone informed. Last, you get professional support. Support is actually a pretty big deal. Why? Because if your blog becomes your business, you’ll need it. Things go wrong with websites sometimes, and that’s just a fact of life. With support, you can usually resolve those problems a lot faster and more easily. Without it, you’ll have to rely on the community. Now don’t get me wrong, the community is amazing, but they’re not getting paid to help you fast. In the end, it depends on whether blogging is currently your hobby or your job.