Inside this Article
Step 1: Define Your Clothing Niche and Brand and Devise a Business PlanStep 2: Register an LLC and Apply for Licenses and PermitsStep 3: Source Supplies, Samples, and Clothing PiecesStep 4: Choose a Reliable Web Hosting ServiceStep 5: Set Up Your Online Clothing StoreStep 6: Market Your Online Clothing StoreAn Easier Alternative to Get a Clothing Store OnlineStarting a Clothing Store Online Is Hard Work but It’s Easier Than You ThinkFAQ
Step 1: Define Your Clothing Niche and Brand and Devise a Business Plan
You can either sell existing brands or your own clothing line (more on that later).
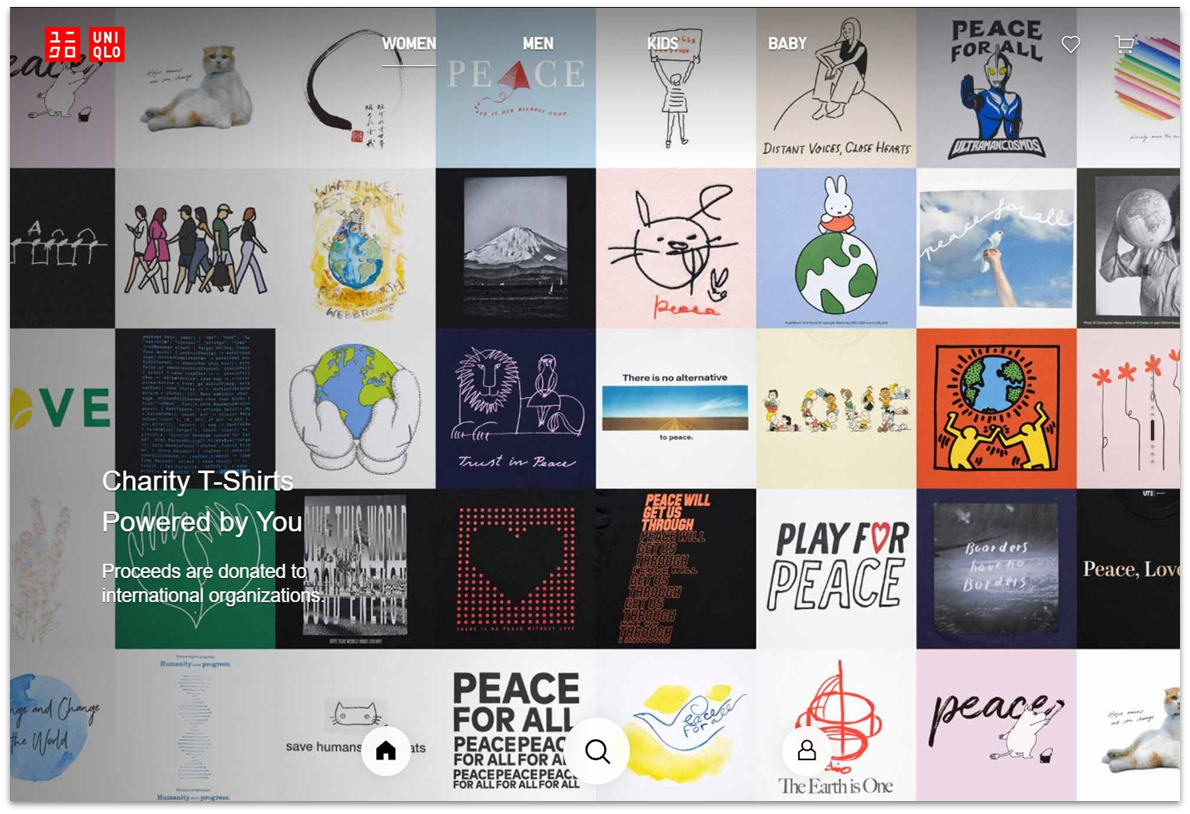
Depending on your store’s direction, it’s time to settle on your niche and branding:- Who is your customer? Men, women, kids, pets, or a mix of these?
- What’s your focus? High fashion, affordable buys, party outfits, everyday wear, office attire, jeans, shoes, handbags, accessories, or something else entirely?
- What is your company ethos? Are you minority-owned or support social causes? Or do you have another core value or mission that makes the world better or more equitable?
- What’s your unique selling point (USP)? This can be eco-friendly practices, plus-size clothing, custom tailoring, a repair program – think about what makes you different.
- What’s your business name and its trademark look? What will be your brand colors and logo?
Purchase a Matching Domain Name
A domain name is your business’s online address, so you should buy one that matches your business name. If your domain name is already taken, your business name is likely taken too – and it’s also likely that the other company is officially registered under this name. Most countries and states won’t allow you to register a name that’s too similar or identical to an existing company. You also don’t want to copy a brand or confuse customers when they attempt to search for your store online. If the company with the same name is outside your operating country or region or isn’t in the apparel industry, you can register for the same name with a different domain extension. For example, if “xyz.com” isn’t available, “xyz.store” might be. You can also add terms like “apparel,” “tees,” or “accessories” to the end of your URL (“xyztees.com”) to further differentiate it. You can purchase a domain name from a domain registrar like Namecheap or Domain.com. However, many hosts offer a free domain name as part of their packages. Even if you decide to change hosts, you’ll still retain rights to the domain. Just note that you probably can’t get a refund for the domain after it’s registered.Step 2: Register an LLC and Apply for Licenses and Permits
Though it’s not mandatory in many countries, you also have the option of officially registering your company. This can provide various benefits – for example, registering as a limited liability company (LLC) in the US removes your personal liability for business debts, lawsuits, and many other costs and legalities. The good news is that it isn’t difficult or costly to register your company as an LLC or business structure. You can do this yourself through online state or government portals. Just note that as a registered entity, you’ll need to submit annual returns, pay taxes, and adhere to any other laws and fees stipulated by the government. You may also need to apply for specific licenses and permits to operate legally as a clothing company. Luckily, LLC formation services offer registration for free and can assist you with all aspects of business registration, including researching licenses and permits. To find out about the top options, take a look at our list of the best LLC formation services in 2024.Step 3: Source Supplies, Samples, and Clothing Pieces

- White-label clothing. Many factories sell unbranded clothing that you can label with your own branding and packaging. Just be sure to get samples as quality varies – you’ll likely have to place a bulk order, so you don’t want to get stuck with clothing you don’t want to sell.
- Outsourced designs. You can also hire a clothing factory or manufacturer to produce clothing based on your own designs. In this case, you can decide on the pattern, fabric, finishes, and quality, which will also determine the cost.
- Resell existing brands. Many designers are happy to collaborate with clothing boutiques and stores. However, they’ll decide on the wholesale and retail prices. They’ll also take credit for the design and have their logo displayed on the clothes.
- Produce your own pieces. If you’re a designer, dressmaker, milliner, shoemaker, leather crafter, or creator of any kind, you can sell your own pieces. To scale your business, you can train additional clothiers or outsource your designs.
- Dropship clothing. The factory not only produces the clothing but also fulfills shipping. When a customer places an order on your site, the factory will make and mail the order on your behalf. The downside is that you may earn less on sales.
Step 4: Choose a Reliable Web Hosting Service
Before signing up for a hosting plan, you should keep in mind that e-commerce websites are generally more resource-intensive than standard business sites.
So, not just any old hosting plan will do. Look for e-commerce hosting for the best results. The features that differentiate e-commerce hosting from standard hosting are:- Higher server resources. Consider plans with lots of storage (those product listings and high-quality images take up a lot of space!) and dedicated RAM and CPU resources.
- E-commerce features and optimizations. Look for features like e-commerce support (such as WooCommerce plans) and marketing, advertising, and search engine optimization (SEO) tools. You’ll also want performance optimizations like high PHP worker quotas to serve dynamic content like product sorting and shopping carts and caching and a content delivery network (CDN) for faster loading speeds.
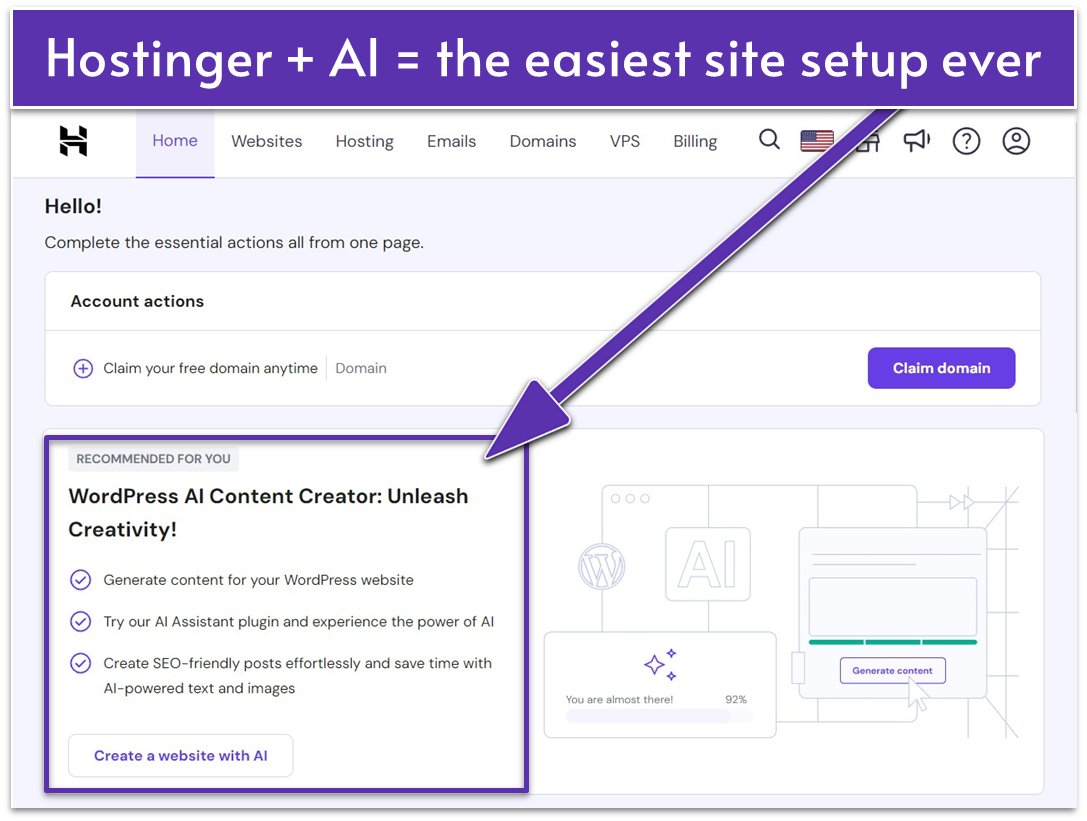
- No-code e-commerce website builder. This is often a drag-and-drop builder with online sales features, ready-made store templates, and AI-powered tools.
- Product and inventory management tools. Keep track of your sales and receive alerts when you need to stock up.
- Secure payment integration. Let your customer pay how they’d like by offering payment types such as credit cards, bank transfers, and digital wallets.
- Scalability. A host should have a wide range of plans and hosting types (shared, cloud, VPS, dedicated) to suit various needs. This ensures that as your online clothing store grows, you can upgrade your resources without changing hosts.
- Performance. Your site should load fast to ensure the best shopping experience and sales. Look for loading times of 2 seconds or less (ideally 0.5–1 second).
Hostinger for E-Commerce
Step 5: Set Up Your Online Clothing Store
If you want to sell clothes online, you have several choices as far as your online presence goes, including:- Sell in a marketplace without setting up a website. You can easily set up shop on marketplaces like Amazon or Etsy, but you’ll likely need to pay listing fees and commissions on sales. Plus, you won’t be able to brand your storefront or customize your site’s design.
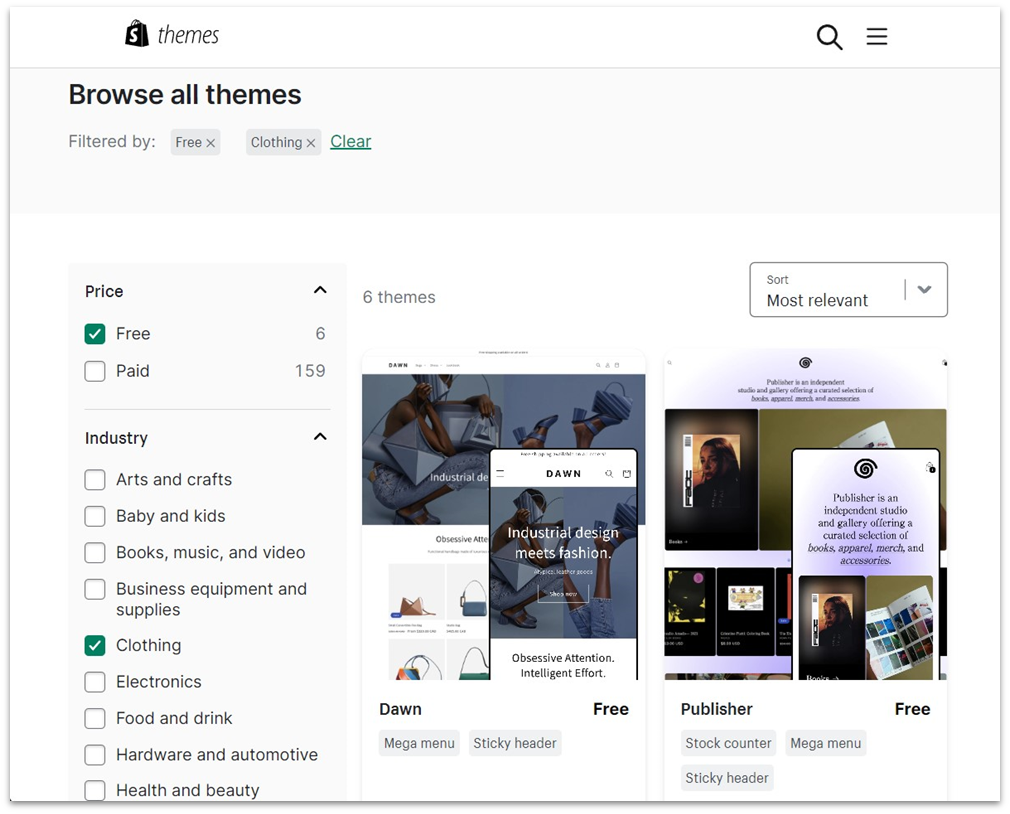
- Use a paid e-commerce platform. Platforms like Shopify allow you to set up your own online clothing store. While these tools are the most user-friendly, fees are usually higher and you won’t be able to migrate your site elsewhere.
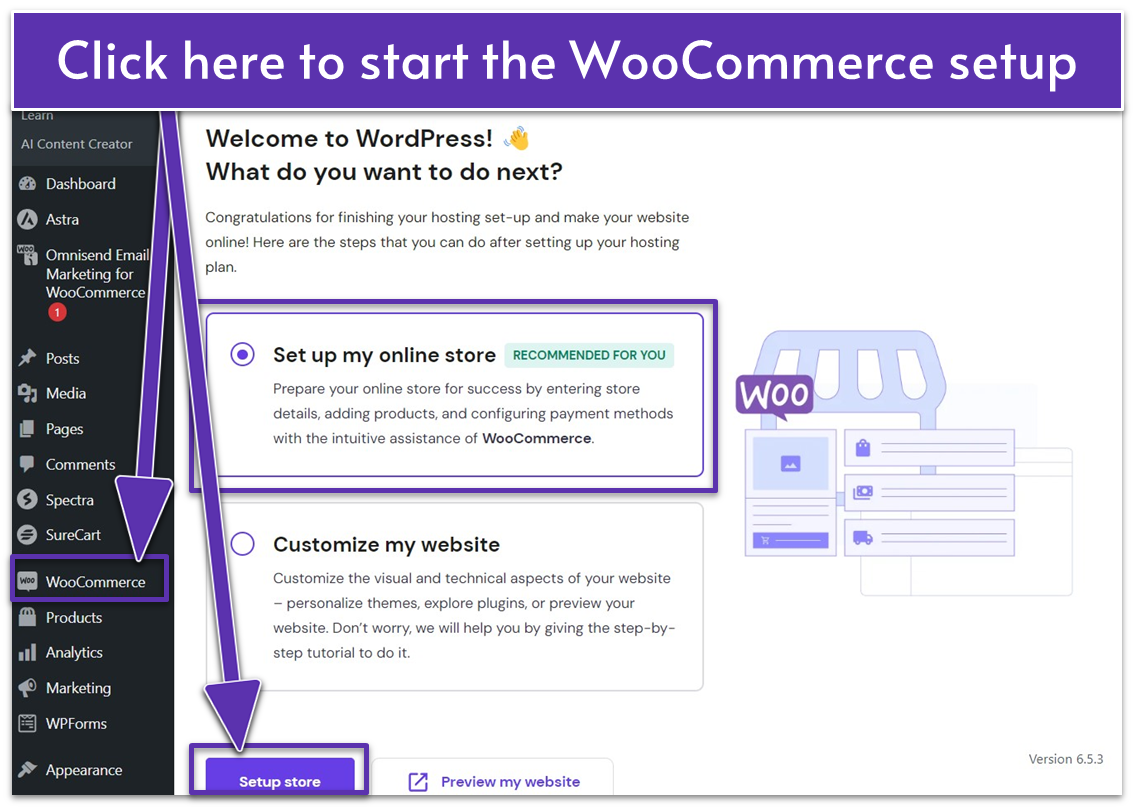
- Use WordPress.org with WooCommerce for free. Turn your WordPress site into an online store by installing WooCommerce or another e-commerce plugin. All you need to buy is hosting and a domain. You can even find special hosting plans optimized for WordPress and WooCommerce.
Pro tip: The WordPress installation process should be similar for most other hosts as many now offer 1-click WordPress installations. However, if you opt for unmanaged cloud, VPS, or dedicated hosting, you may need to install WordPress manually.
Install WordPress
In Hostinger’s proprietary control panel home page, hPanel, you can choose between two website builders: Hostinger’s AI-powered website builder or WordPress.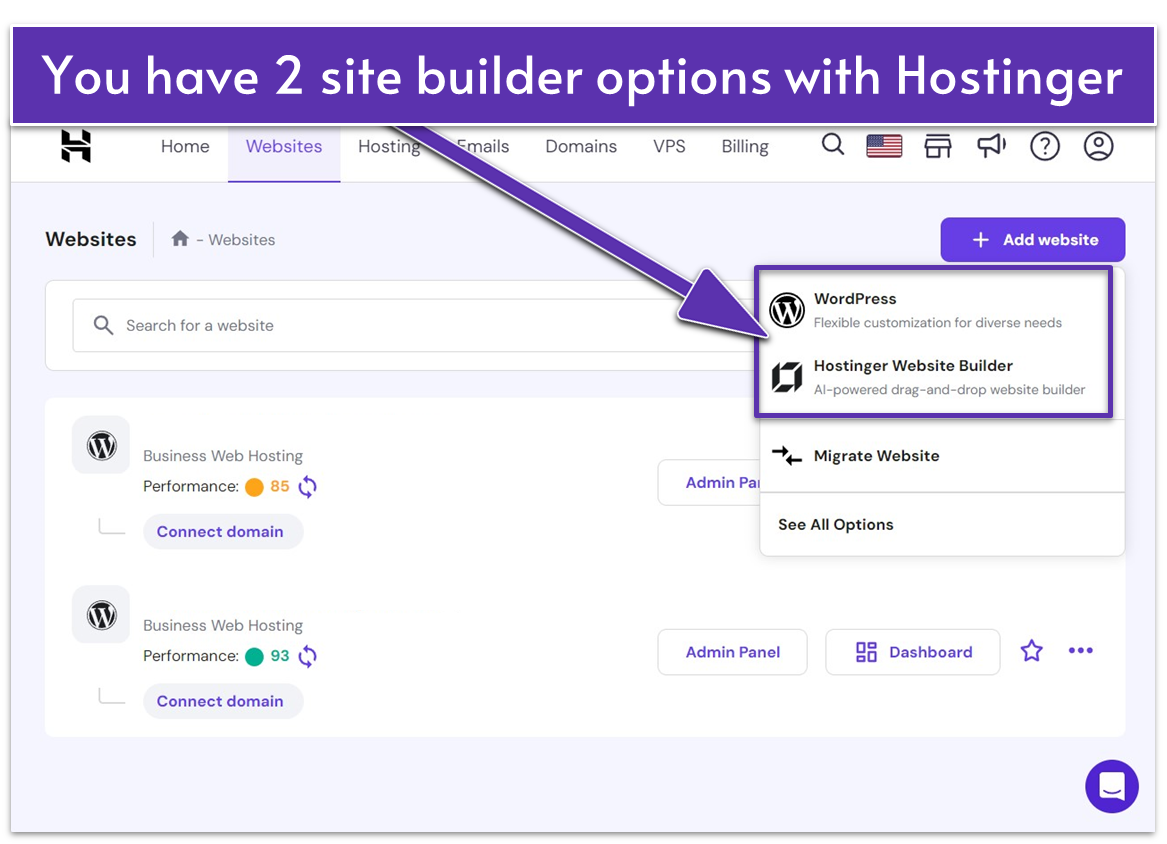
Choose a WordPress Builder and Theme
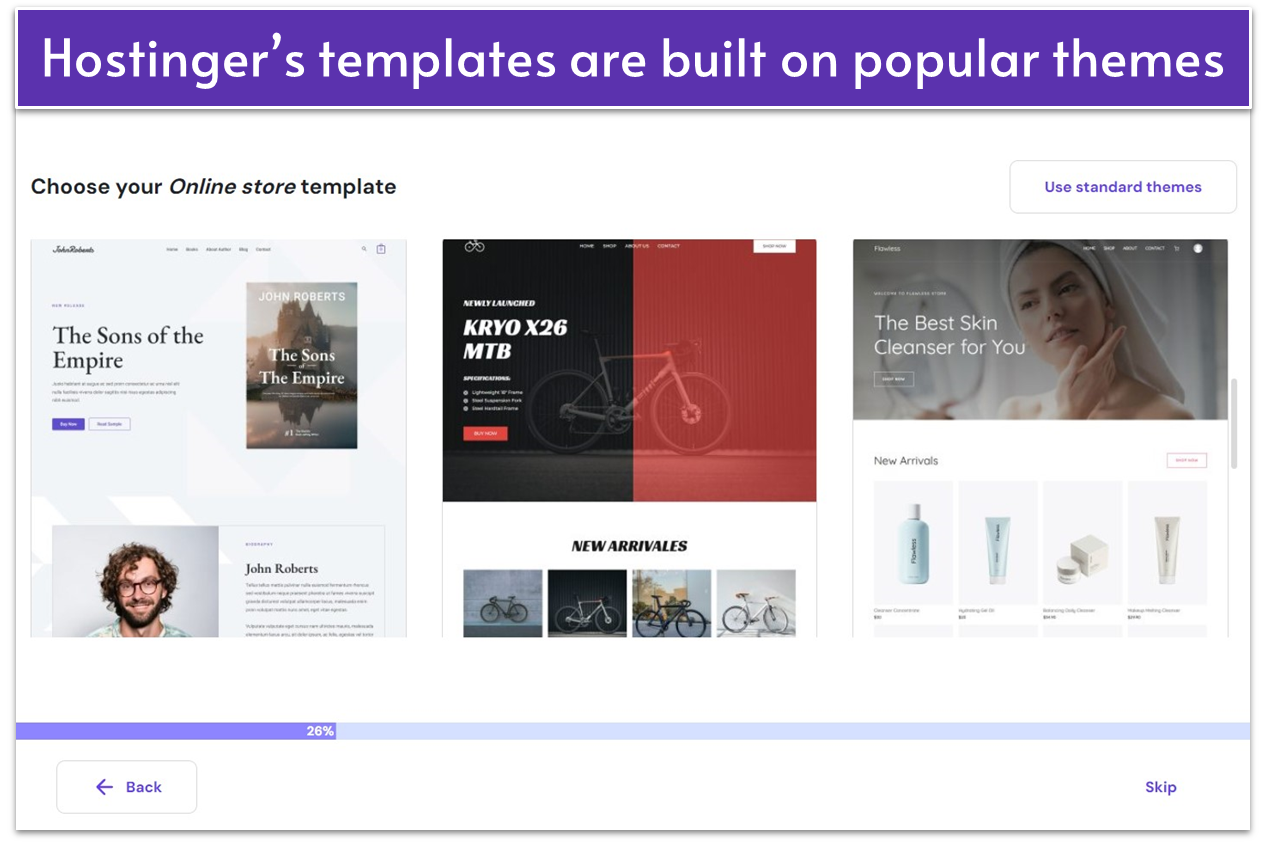
Pro tip: WooCommerce is compatible with all WordPress themes. You can change your template or theme in WordPress or when configuring WooCommerce. However, you cannot edit third-party site templates in the WooCommerce store editor. I’d advise you to remove any installed templates before creating a new design using WooCommerce to avoid errors.
Consider These Useful (Free) Plugins
Before working on your website design, you can add other essential plugins, including security, e-commerce, marketing, website management, and analytics apps and tools.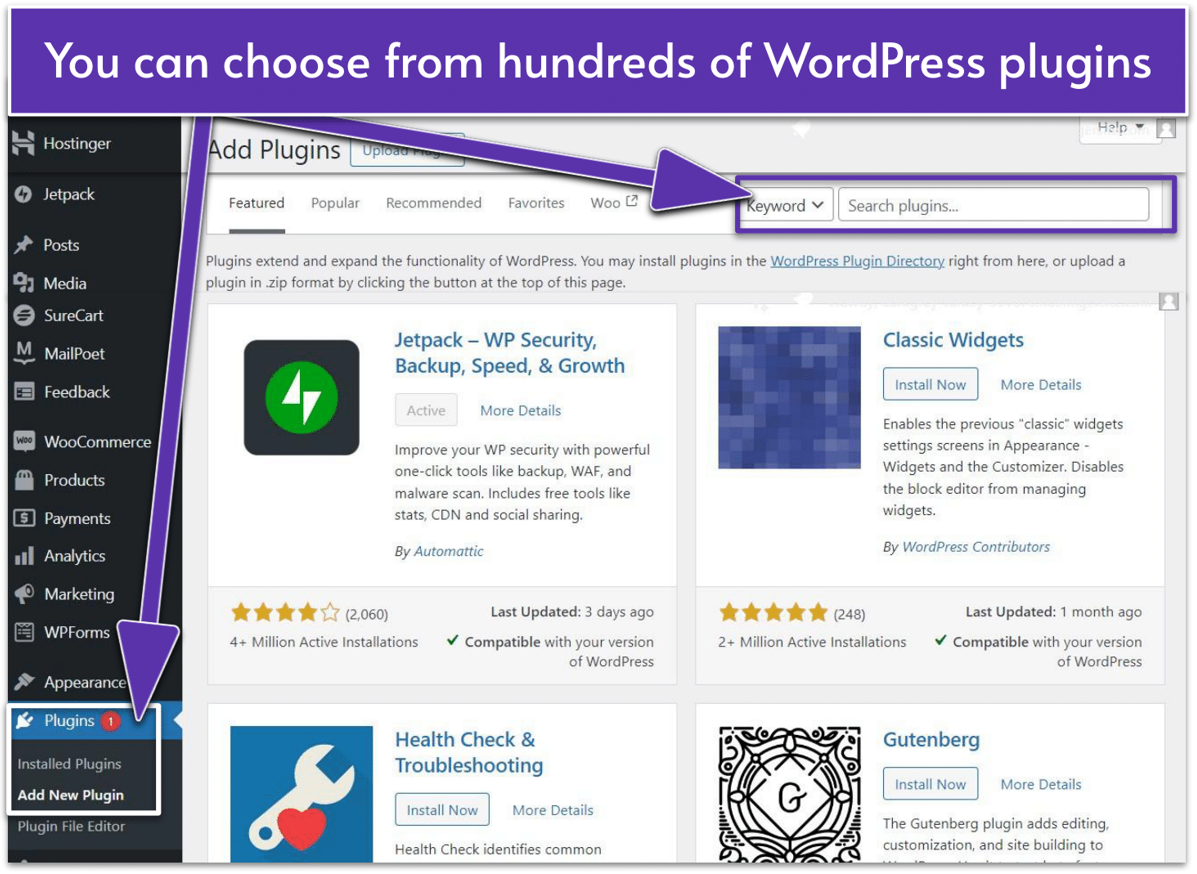
- Yoast SEO. Improve your website content to rank better on Google and other search engines. Yoast can help with metadata, content structure, and internal linking best practices. AI-generated content isn’t often SEO-optimized, so this plugin is useful for fixing any issues.
- WPForms. Add interactive forms, polls, surveys, newsletter sign-ups, and more to your online store. This can help streamline your customer service, cultivate a mailing list, and improve interactions with customers.
- Wordfence Security. Protect your site from hackers and malware with security features like firewall, malware scanner, two-factor authentication, and more. However, do note that many hosts (Hostinger included) will include all these security features in their plans for free.
- CookieYes. Stay compliant with cookie and privacy laws in many countries when collecting data and analytics on your site visitors. You can use this plugin to create custom cookie compliance banners, good for up to 25,000 visits monthly on the free plan tier.
Pro tip: If you install the Jetpack AI Assistant tool, you need to sign in to or create a WordPress.com account. These details aren’t the same as the WordPress.org login details I set up earlier.
Set Up and Customize the Most Relevant Site Pages
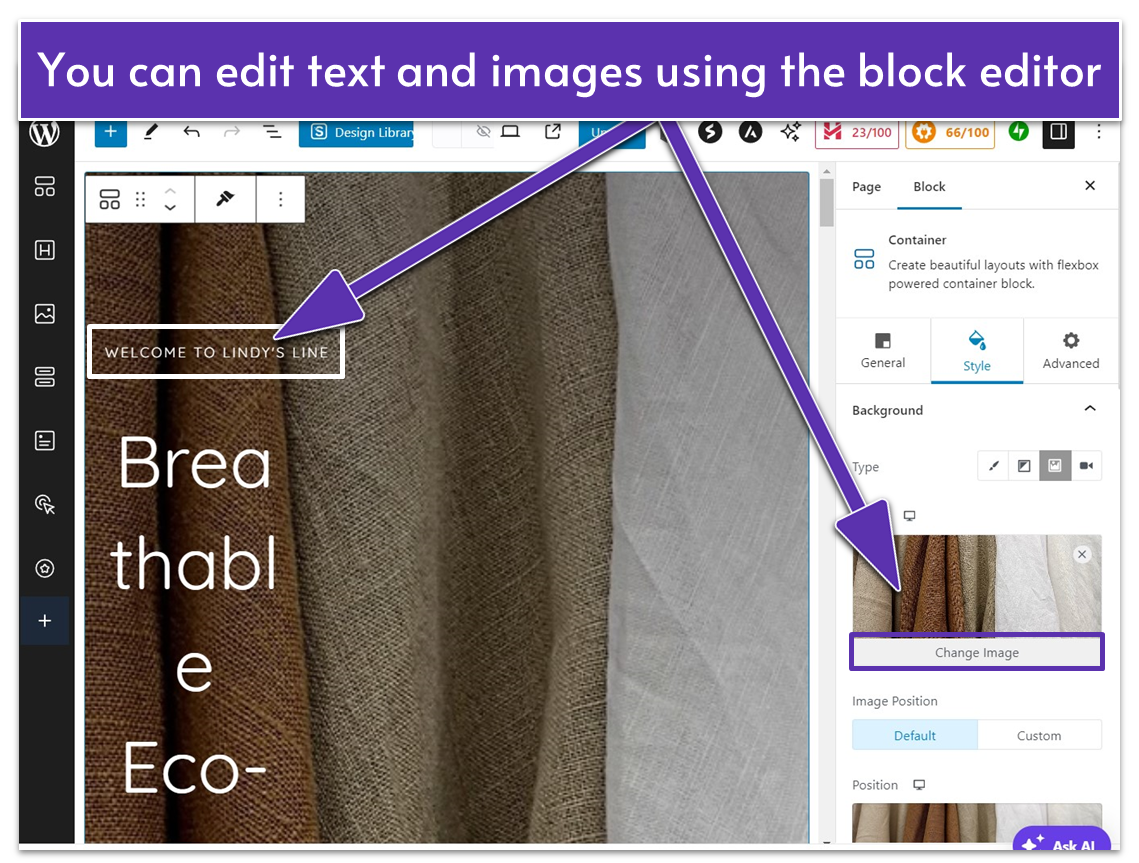
Your online clothing store should, at the very least, feature an attention-grabbing landing page. Some stores choose a one-page website design that fits everything on the home page, including products, about us, and contact info sections. However, you can separate these as needed. If you’re using a template, pages are automatically propagated in WordPress for you according to the design. Since I already installed a pre-made website template, WooCommerce will assume I’ve “customized” my store. However, the template isn’t personalized. This is where things get tricky as the WooCommerce store editor doesn’t support third-party templates like the stylish Hostinger skincare store template I chose.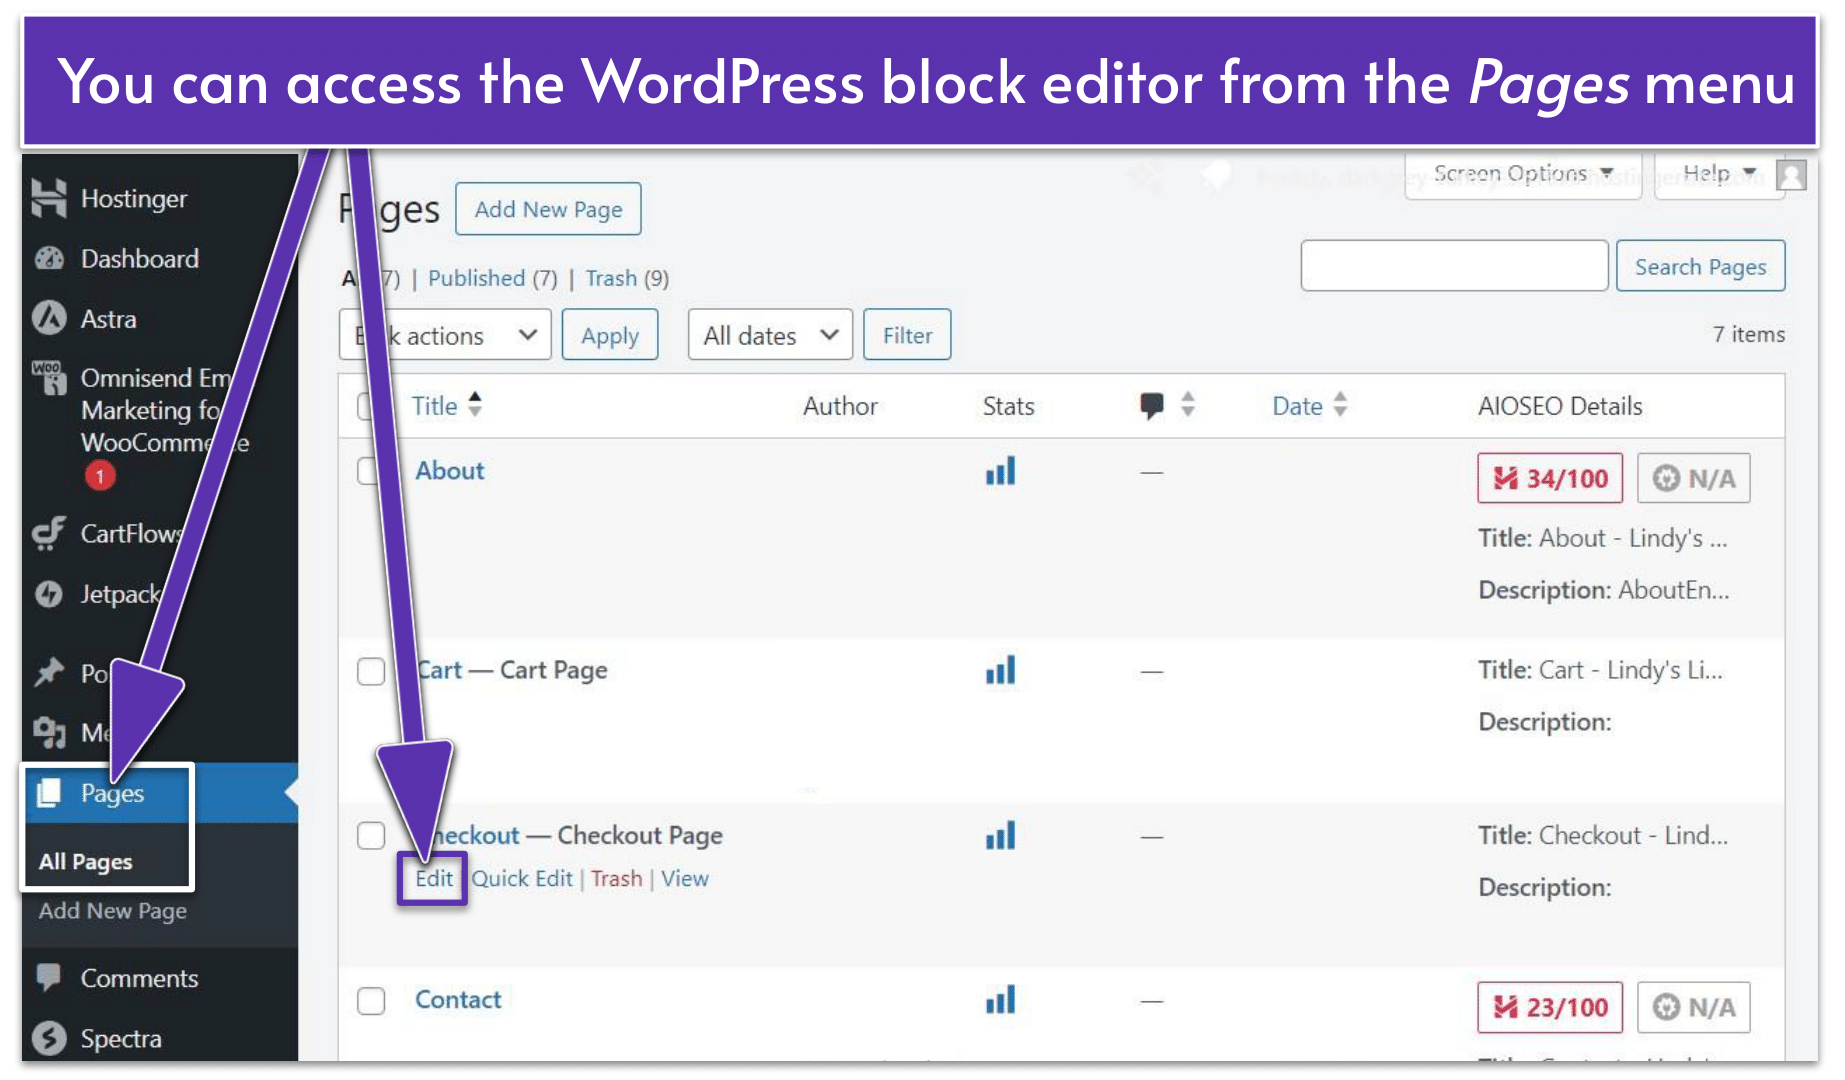
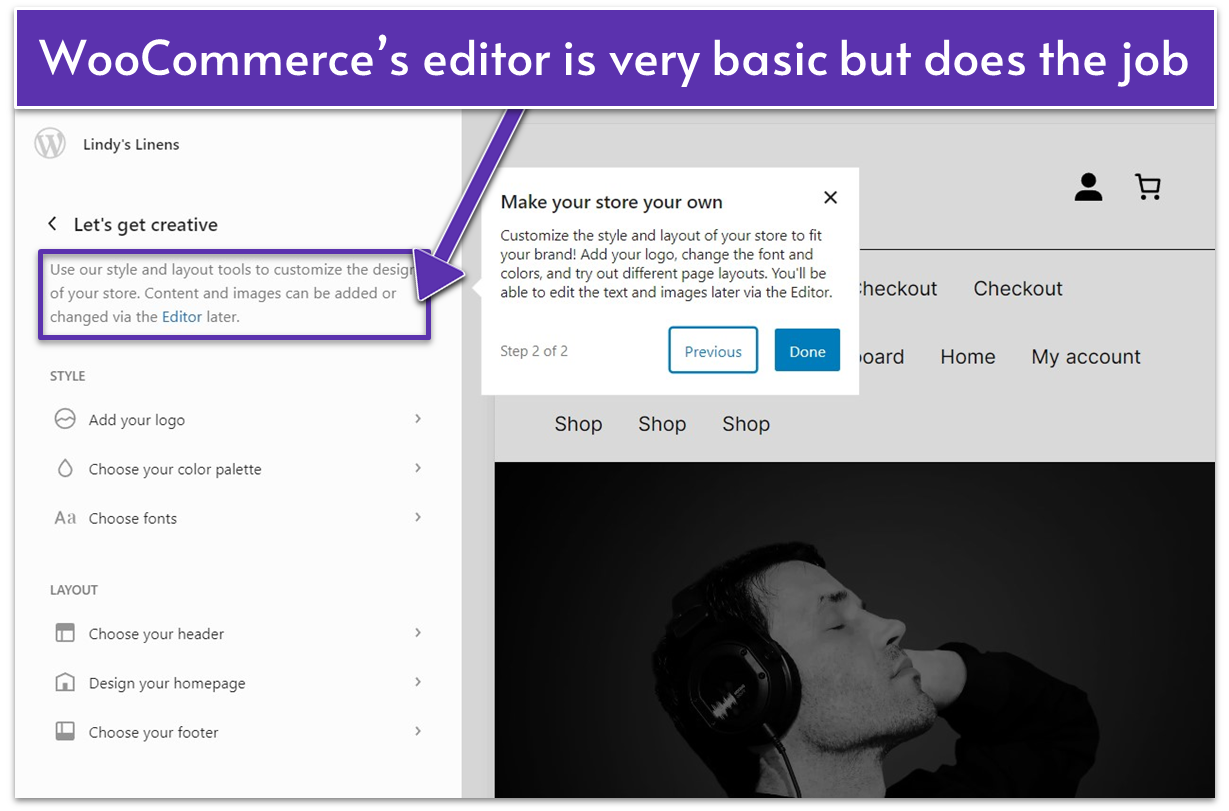
Add Product Listings to Your Site
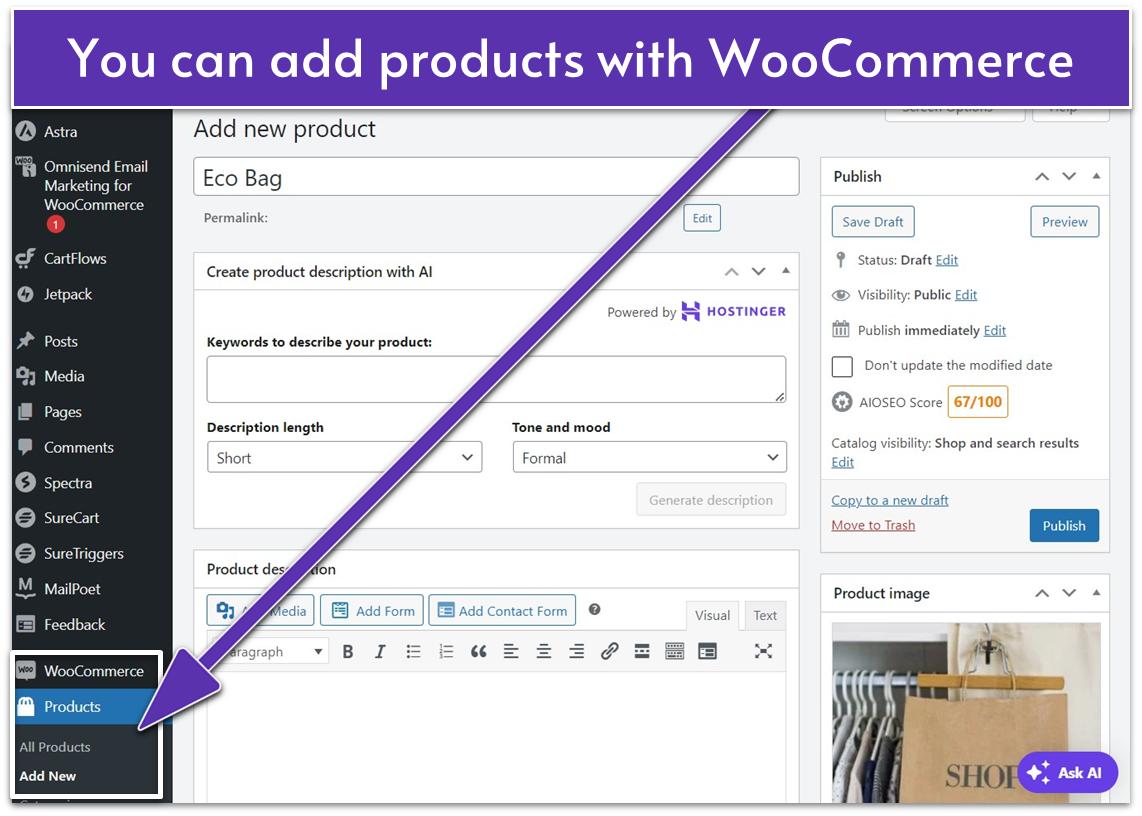
- Enter your product info, including name, description, price, and sale price.
- In the right-hand menu, add your product image(s).
- Use an SEO plugin (like AIOSEO or Yoast) to optimize page content and metadata.
- Click Save Draft if you still want to work on the listing before publishing it or Publish to make your product listing live.
Test, Revise, and Publish Your Clothing Store
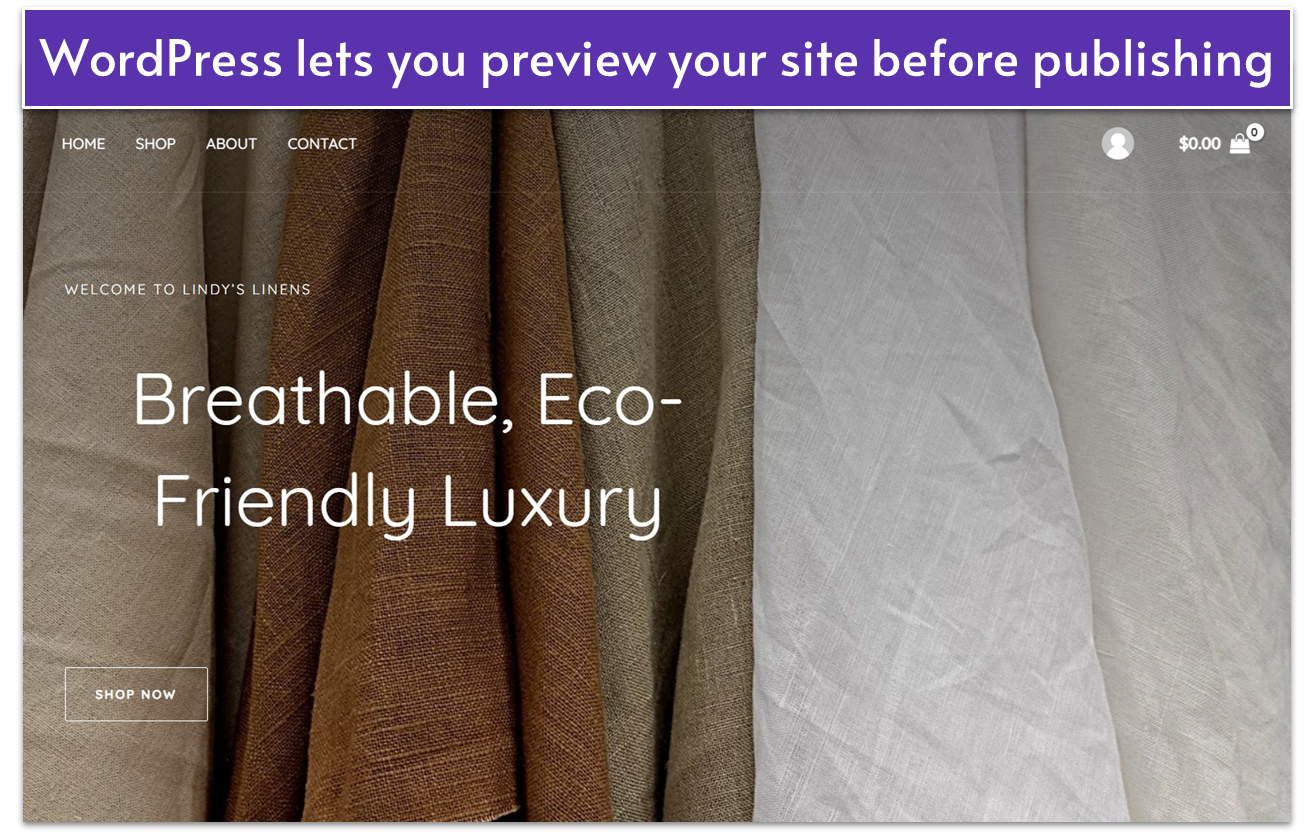
Now that your design is complete, the last step is to test your site. If your customers experience glitches and issues on their first visit, chances are that they won’t return. Important things to test include:- Responsiveness. WordPress lets you toggle between screen sizes when editing and previewing your site so you can see how your site looks across devices. Make sure elements are clickable and text is legible on mobile devices.
- Links. To ensure all links are working, view your website while logged out of WordPress and test all interactive elements.
- Product information. It’s easy to confuse prices, product names, and images, but doing so can cost you. Your product descriptions are legally binding. If you confuse prices or names, you’ll still need to fulfill orders as described.
- Site performance. You can monitor your website’s uptime with UptimeRobot. Also, be sure to test loading speeds and global performance using a reliable speed testing tool. If not installed, ask your host to help you add optimization tools such as caching and CDN.
Step 6: Market Your Online Clothing Store
Here are a few ways to promote your clothing store and brand – online and offline:- Organic SEO. Create a user-friendly, safe e-commerce website with quality content, relevant keywords, and fast loading speeds to improve visibility on search engine results pages.
- Set up a newsletter. Use email marketing services to connect with existing and potential customers. Most services have a WordPress plugin that makes it simple to embed sign-up forms on your website.
- Create social media pages. Make your clothing brand visible on TikTok, Facebook, YouTube, Instagram, and Snapchat. Social media management tools can help you post brand-consistent content regularly on all platforms.
- Set up online ads. You can pay major search engines to display your clothing store’s ads on relevant search results. On social media, targeted ads can reach users based on their demographic data or interests.
- Attend clothing trade fairs, expos, markets, and pop-up events. This will spread the word about your brand and help you build your own professional network in the industry.
- Hire a marketing and advertising expert. You can hire full-time talent or freelancer services to develop an effective marketing plan for your clothing business.
An Easier Alternative to Get a Clothing Store Online
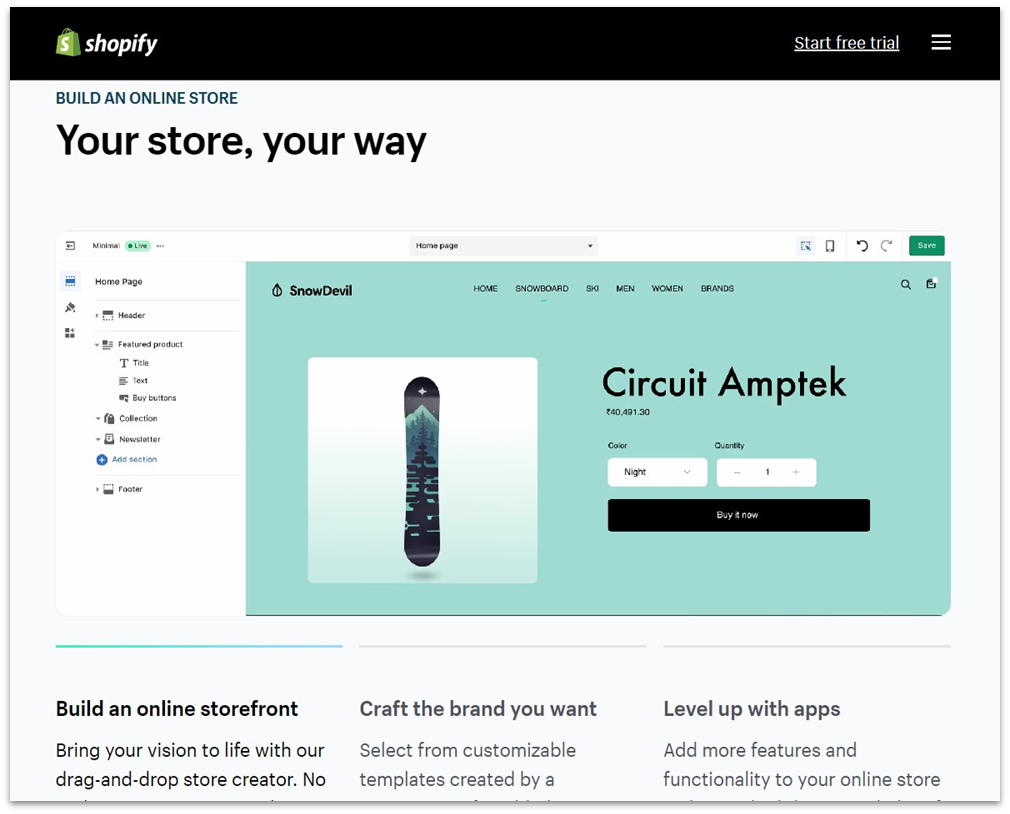
You can also build your online clothing store with an e-commerce platform – and one of the best options is Shopify. It offers an online store builder, hosting, and e-commerce tools under one plan. Plus, Shopify offers a 3-day trial with no credit card required.
- Size Charts & Size Guide – ESC. You can specify clothing sizes and measurements in your store to reassure customers and reduce refunds and returns.
- Easyship. Get access to low pre-negotiated shipping rates for destinations around the globe and shipping and order management tools like label printing.
- Printful. A print-on-demand dropshipping app that handles the production and fulfillment of your custom-printed clothing orders, allowing you to focus on marketing and growth.


![8 Best Enterprise WordPress Hosting (Scalable & Reliable) [2024]](https://dt2sdf0db8zob.cloudfront.net/wp-content/uploads/2024/11/Best-Enterprise-WordPress-Hosting-1.png)


